
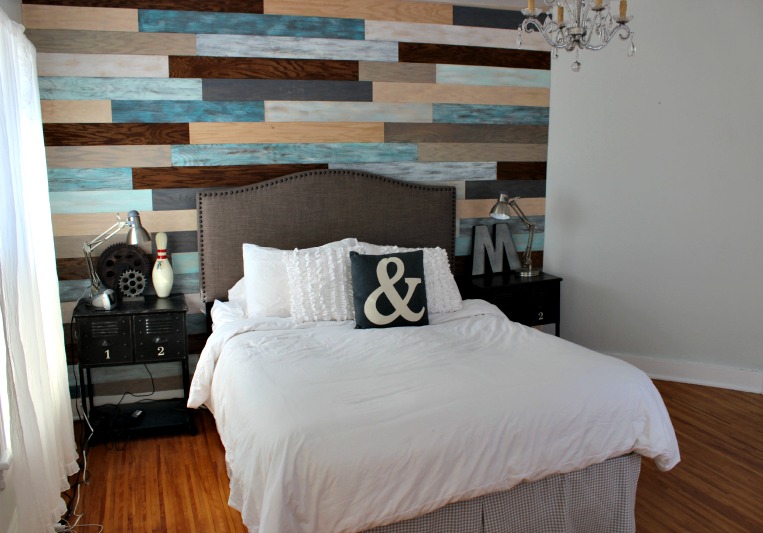
(Well don’t look at the top of our lopsided wall. We’ll add a piece of trim up there soon!!)
I’ve had some requests for details on the plank wall, so here goes:
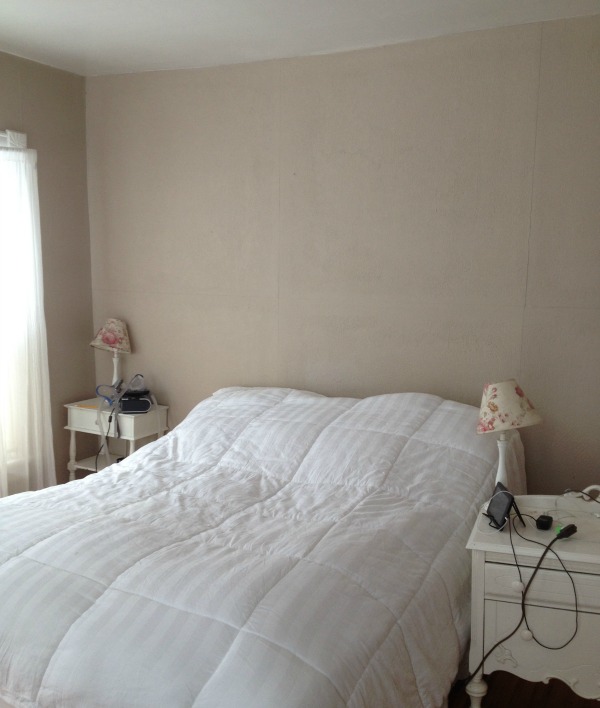
I’ve been DYING to make a plank wall somewhere in my house. Since our bedroom was severely lacking in style I knew that’s where the wall would go.
I would of course have loved to find old barn wood or pallet wood or something cool and reclaimed, but since
1. I’m impatient
2. Our area of the world has been so covered in snow and ice, it’s hard to get out and look for said reclaimed wood.
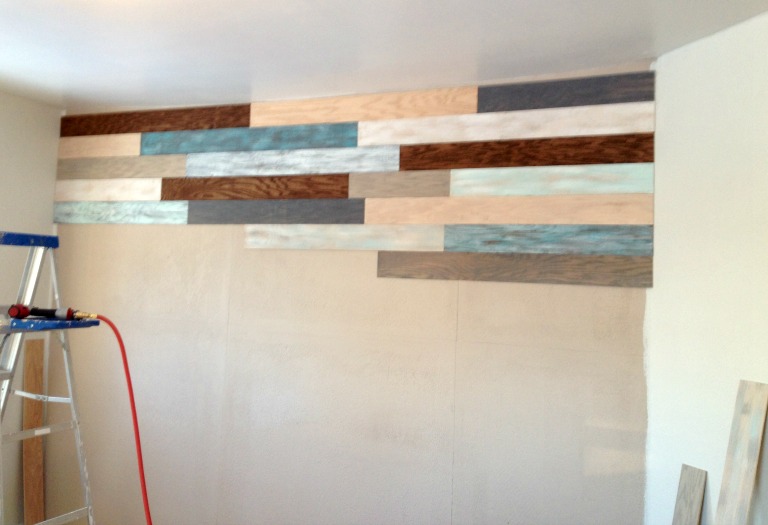
So instead we used 4- 4 x8 sheets of Oak plywood I purchased at Lowes (29.00 each) and had them cut it down to 5 inch planks. So the planks were 5 x 8 when I brought them home.
Once I got them home I set up a couple saw horses and started staining and painting the planks. (Sorry no pictures)
Over the course of two days I prepared the planks. I used Rustoleum’s Driftwood, Weathered Gray, Dark Walnut, and Willow wood stains. I bought a couple of little sample paint pots at Lowe’s too in gray, turquoise, light blue, and white. Once I had all the planks stained I dry brushed different combinations of the paints over some of the planks.
I then painted the room and all the trim. I left the plank wall the tan color it already was because seriously why would I paint something I don’t have to? =) AND I thought it would be a more neutral color for behind the planks
Then it was time to install.
My loving father had given us a miter saw some time ago, but do you think we could find it? Someone must have stolen it out of our garage in our last home. So we purchased a new miter saw and a finish nail gun. I highly recommend borrowing or buying these two items if you’re going to do a plank wall. It made it go so fast!!
We started at the top. It’s important to make sure this top row is level!! Even if your house is insanely lopsided like our old girl!! Haha. If not your plank wall could end up diagonal.
We used a level to make sure it was straight , started from left to right, and just used the finish nail gun to nail them right to the wall. (Our wall was a weirdly paint finished plywood underneath so we didn’t have to worry about a million nail holes. If we decide to take it down after a few years, we’ll just remove both layers and drywall.)
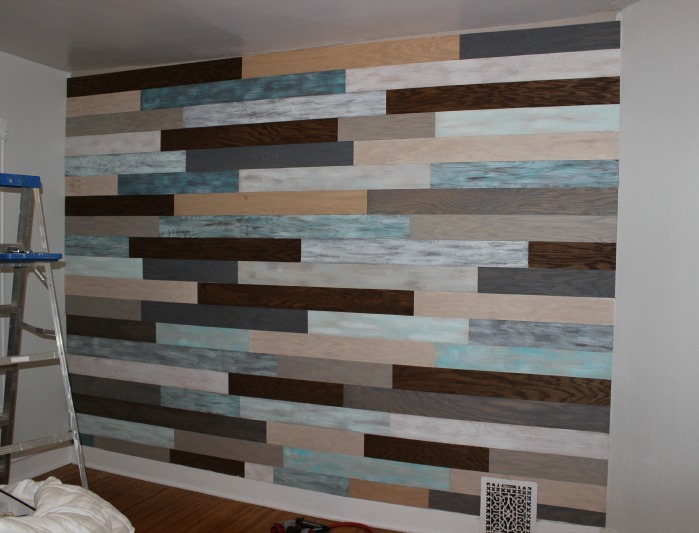
All the following rows we installed from right to left so we would have a nice clean edge on the angled wall on the right side of the room (it’s where the chimney is.)
I would just chop all different sizes of planks, bring them up to The BG and he would nail away. We tried to vary size and color as we went along.
Here we are finished in the evening:
We’re still trying to decided what to trim it out with at the top?? and searching for the perfect mirror to hang above the bed.
Later gators!
Melissa
