
Hi friends! I know it’s been a bit since last we spoke, and I really need to catch up with you all. I hope your summer is going well!
I’ve been doodling around with hand embroidery quite a bit these last few weeks as I find it’s very easy to do in the car, or at the beach while watching the kiddos.
I kept dragging around my projects and floss in a draw string bag that kept getting all tangled up. The solution? An Embroidery Floss Folder! Yeppa!

Here’s a quick and dirty tutorial if you need to make one too!
Supplies:
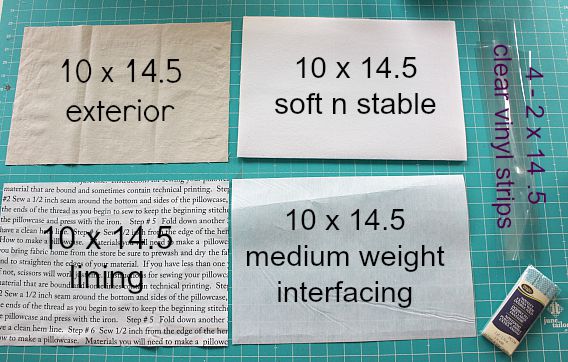
*10 x 14.5 inch of one each-
Exterior, Lining, Medium weight fusible interfacing, Soft N Stable
*Package of binding for pockets (or make your own)
*2 strips x WOF for binding exterior
4- 2 x 14 .5 inch strips of vinyl ( I think mine was 16 gauge ?)
A hera marker, non-stick presser foot, binding clips
Step One
Iron your medium weight interfacing onto the back of your lining fabric. Set aside
Step Two
Cut your pocket binding strips into 15 inch strips.
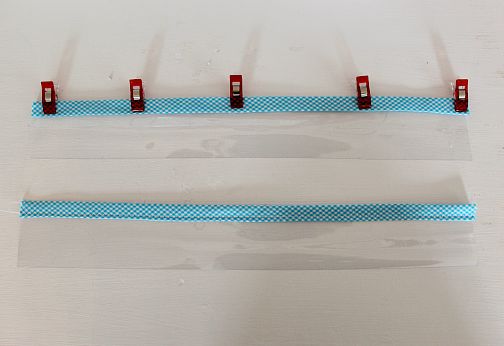
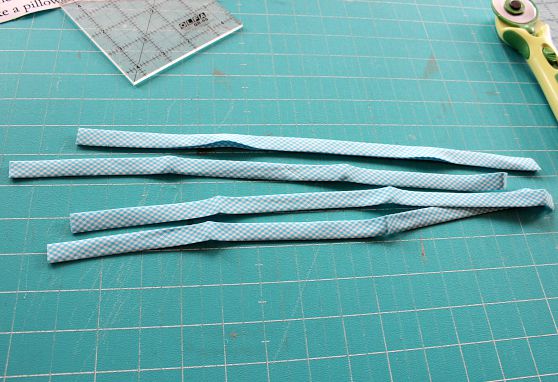 Using binding clips to help hold the binding on your vinyl pocket pieces, top stitch the binding onto all four.
Step 3
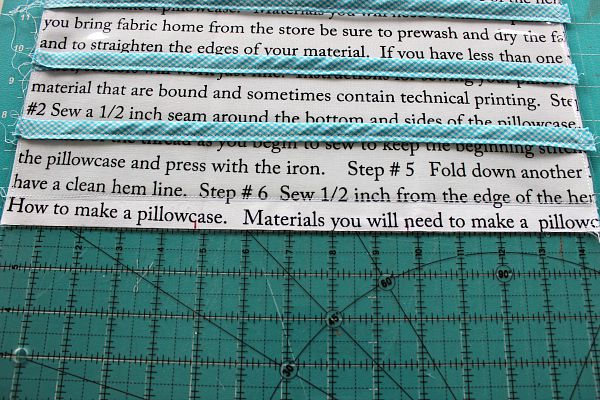
Use a ruler to measure 1 1/2 inches down from the top of your lining piece. Line your first pocket up with this and use binding clips to hold as you stitch close to the bottom edge. If you have a non-stick presser foot for your machine it may help to use it for this step.

Continue lining the top of your pocket pieces up with the last stitched line and stitch close to the bottom of the vinyl.

The last pocket piece should leave about 1/2 inch of lining uncovered.
Step 4
Using a water or heat soluble fabric marker and your ruler-mark lines at the top and bottom (picture shows only marks at the top, but do the bottom too!) at the 2 5/8, 4 3/4, 7 1/4, 9 3/4, and 11 7/8 inch marks.

Line your ruler up at the center marks first and press the line with a hera marker.
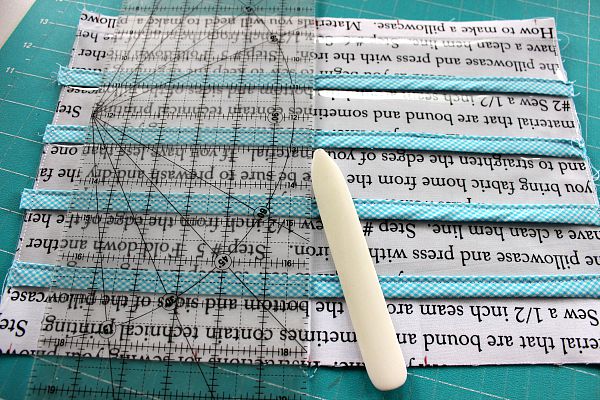
Machine stitch on the line you pressed with the hera marker.
Repeat this process with the other marks you measured -moving out from the center.
Congrats you just made your pockets!
Step 5
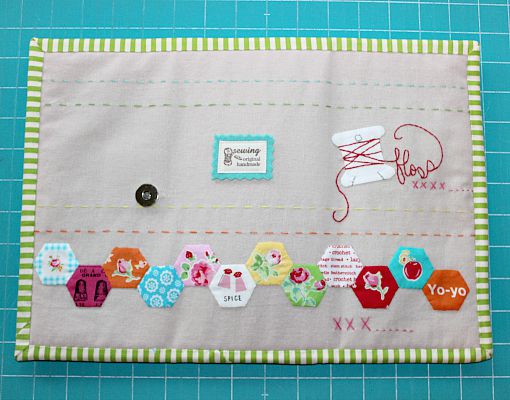
Embellishing- you may chose to patchwork, embroider, or add applique to your exterior. I added a little bit of this and that to my exterior.
Step 6
Layering-
Lay your lining/pockets face down, lay the soft n stable on top, then the exterior face up.
You may chose to add a snap or magnetic closure at this time.
If not then just use binding clips to keeps your layers together.
Use your walking foot to baste the layers together stitching with a 1/8 seam allowance around the entire outside.

Step 7
Bind your project like you would a quilt.
AND ENJOY!
Later gators,
Melissa

Love, love, love this! Thanks so much!
That is not only practical, but so pretty as well. Thanks for the tutorial.
I love this. It’s so cute and practicle. I too started a quick embroidery project this summer and tossed all of my floss in a baggie. When I saw your latest I was amazed and inspired with your creativity. And it’s so pretty. Thanks for sharing and inspiring the rest of us 💜.
Thank you for the sweet comment! Hope you make one =)
Hi Mary! Thank you =)
Hello Marlene! Thanks for the compliment. =)
Oh that is SO beautiful! I love the hexies and the embroidery. You really nailed it! Nicely done with the Soft and Stable. I am going to share this on my Facebook page because it needs to be shared 🙂
Thank you so much!
That is so sweet! I love, love, love it. I will be making one for myself and my bff! Thank-you so much Melissa! Linda