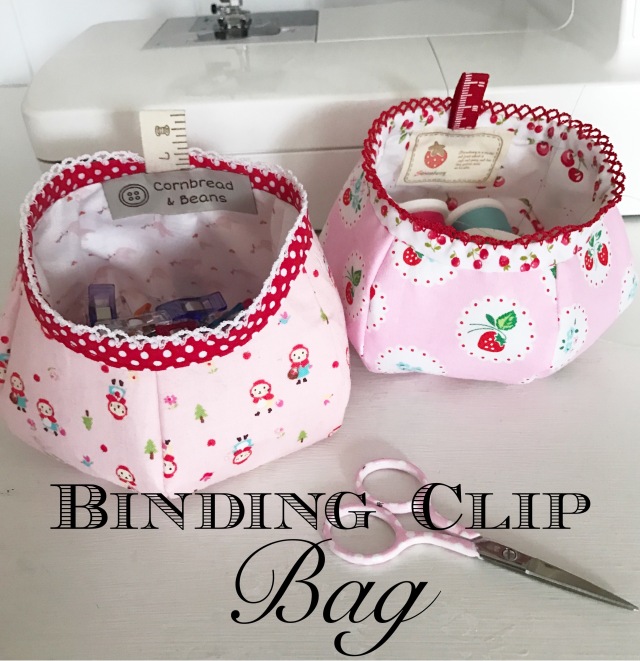
Binding Clip Bag Tutorial

IMG_2250

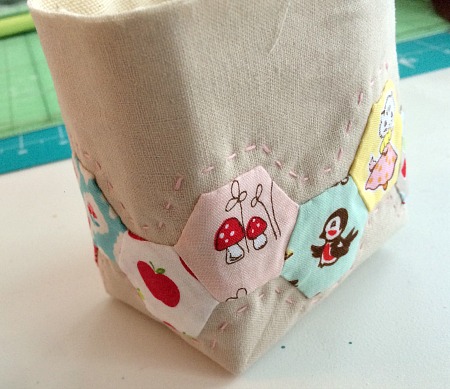
I seriously love binding clips and use them all the time. I didn’t love the plastic box they came in. The box opened awkwardly, and I was constantly spilling the clips all over the floor.  I finally had it one day and decided to come up with a better container option.

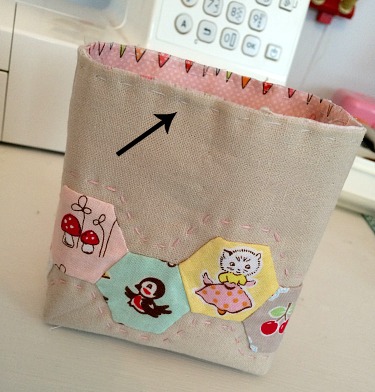
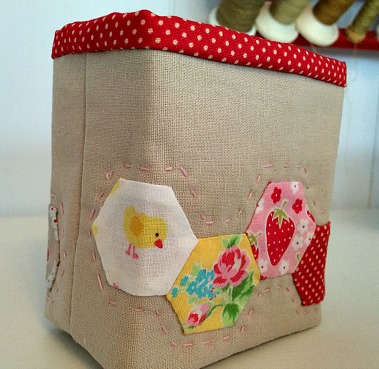
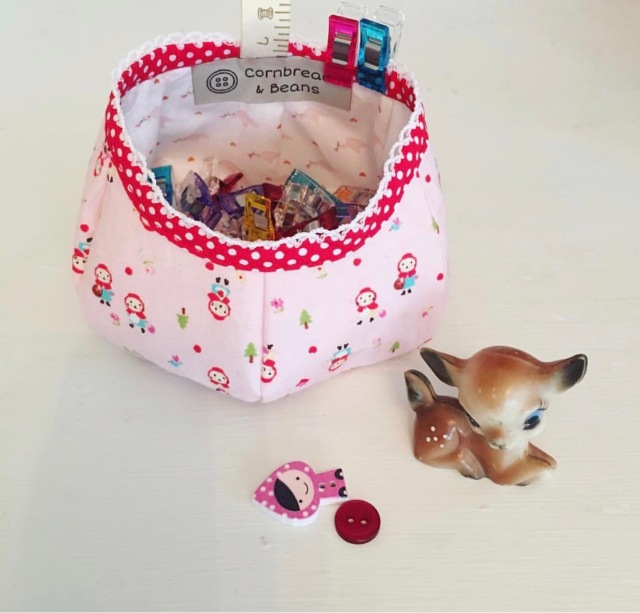
This little container is way cuter, and the medium thick interfacing allows it to stand nice and stiff.  The round shape helps it roll with the wild, hands flying, circus that sewing can sometimes be – without any spilling! Kind of like an adorable weeble-wobble (remember those?)
IMG_2251

I’m sharing a very basic tutorial today, meaning you’re  going to have to draw your pattern pieces, and use your creativity!

1. Make your pattern shapes. 
IMG_2211

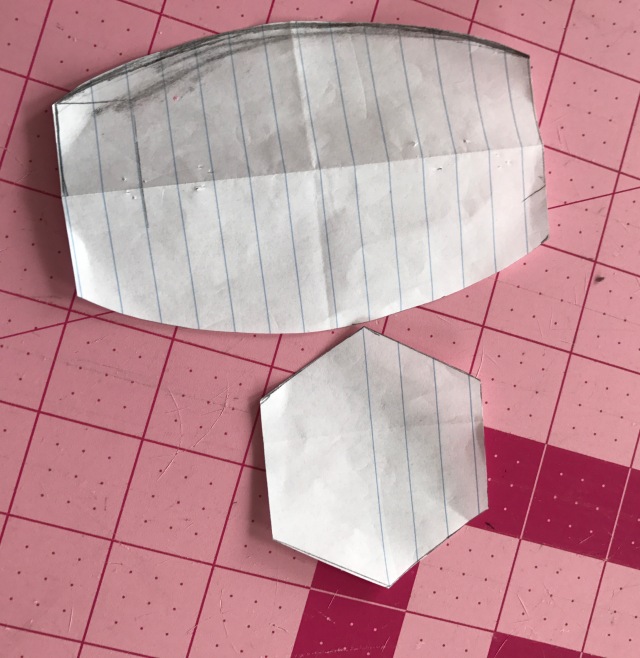
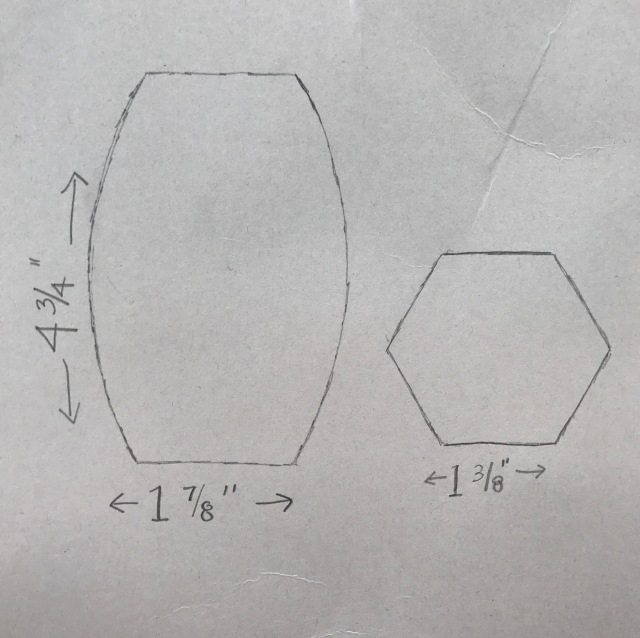
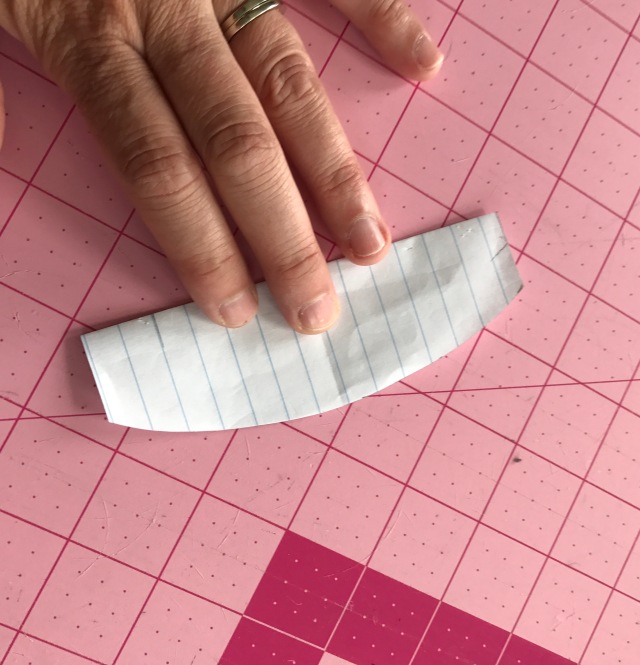
You’ll need a hexagon with sides measuring      1 3/8 “.  And your side piece measuring 4 3/4″ tall, and ends measuring 1 7/8″ wide. To accomplish this side shape- cut a piece of scrap paper 5″ x 4 3/4″ – fold in half, open and draw    1 7/8″ lines in the center on the 4 3/4” ends  then draw a curved line meeting at your lines. Fold in half and cut out your shape.
IMG_2212

IMG_2213

2. Cut your fabrics. 

IMG_2214

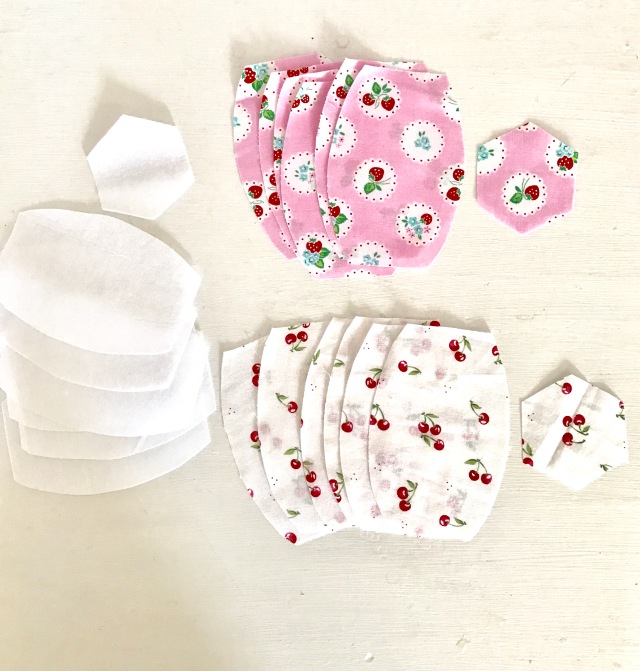
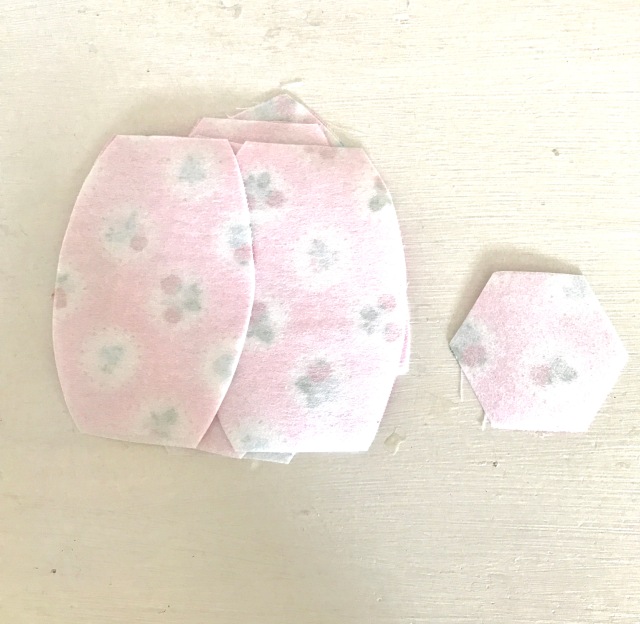
You’ll need 6 outer fabric pieces, 6 lining fabric pieces, and 6 fusible interfacing (medium thickness) pieces.   1 each of outer, lining, and interfacing of the hexagon shape.

3. Iron your fusible interfacing to the outer fabric pieces. 
IMG_2215

4. Sewing pieces together. 

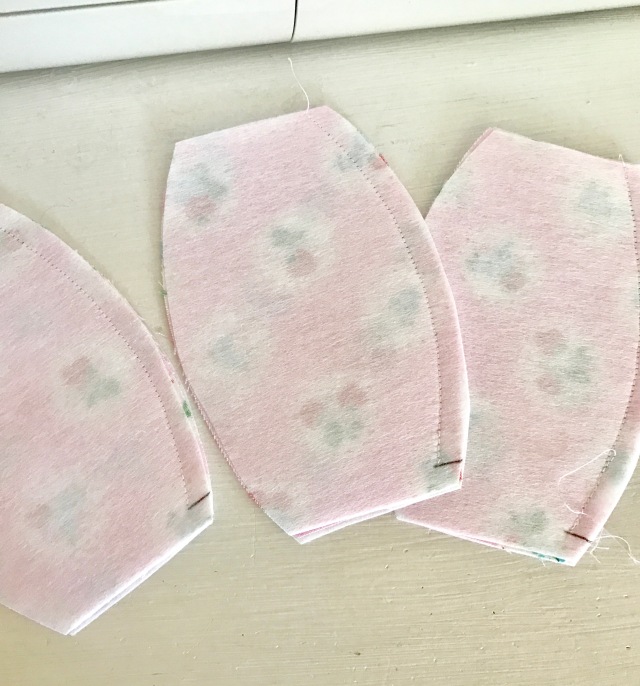
We need to leave the ends of the side panels unsewn 1/4″ on one end to give us a seam allowance to sew in the hexagon piece to make a bottom. If using directional fabric make sure to leave the bottom open 1/4″.

Mark the 1/4″ seam allowances 1/4″ from the bottom with an erasable marker (I used frixon heat erasable marker.) Then begin to sew panels together, stopping and back stitching at your marks.
IMG_2216

Continue sewing panels until they are all joined, and you have a ball shape.
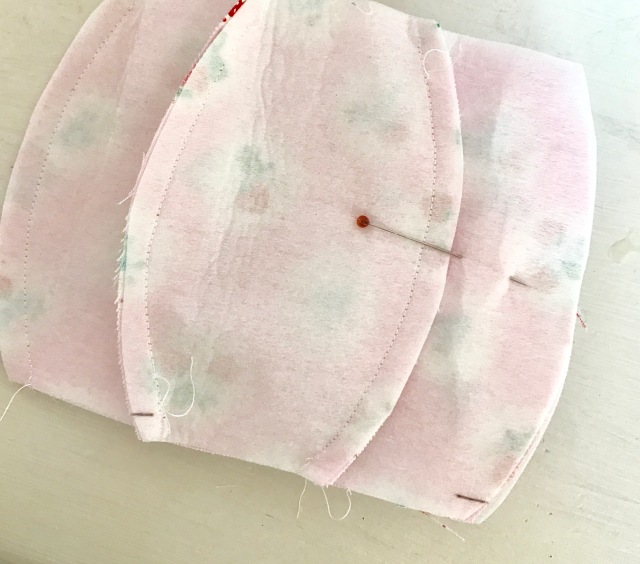
IMG_2217

Repeat with the lining pieces.

5. Adding the hexagon bottom. 

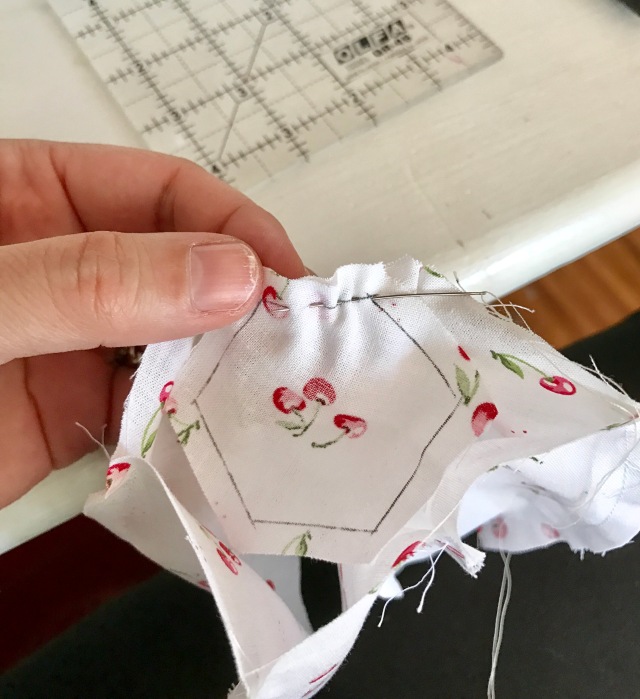
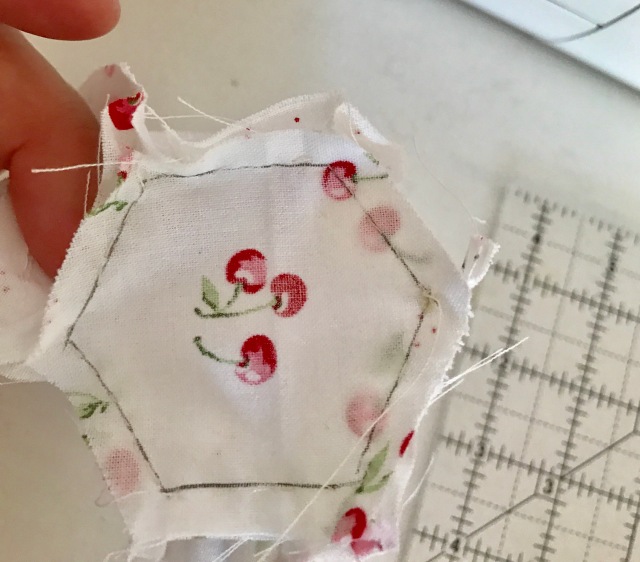
There are two ways to go about attaching your hexagon to the bottom.  1. If you’re an awesome seamstress you can pin and sew with your machine using 1/4″ seam.  I tried this and it was hard for me!   2. This method worked best for me – draw your quarter inch seam lines all around your hexagon, pin in place, and hand sew on the line.
IMG_2221

IMG_2222

6. Finishing

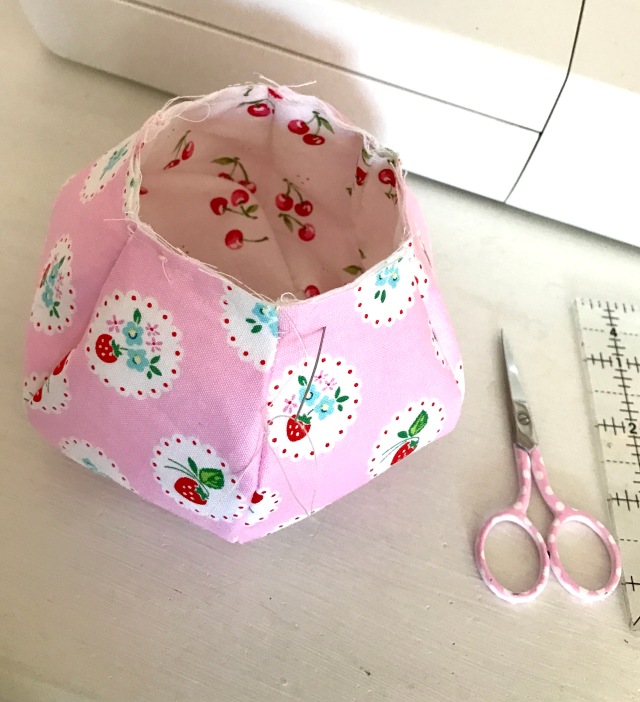
Place the lining inside the outer bag, wrong sides together. Hand baste around the top, using a 1/8″ seam, stop when you have basted three panels, but don’t cut the thread.
IMG_2224

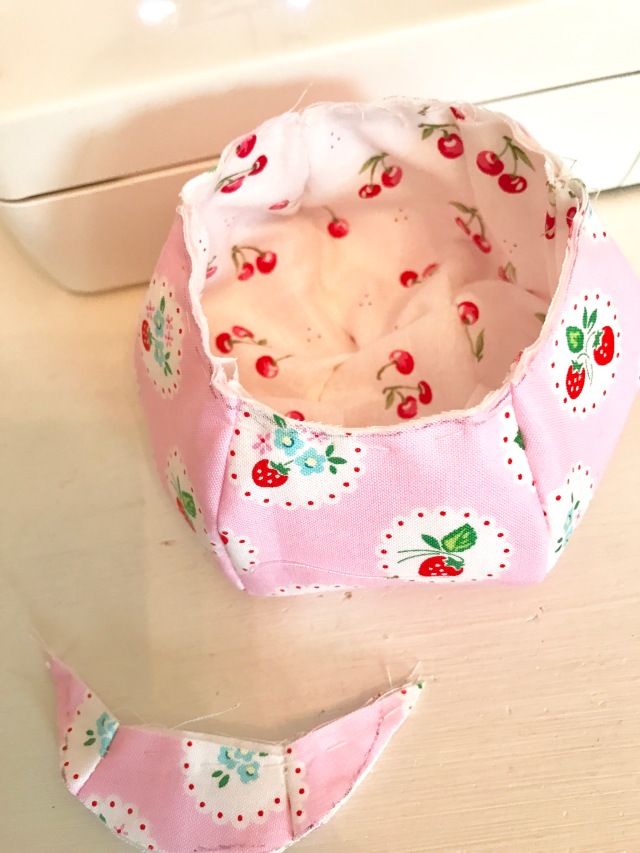
You are going to draw a half moon shape using an erasable marker. I just eyed this until I liked how it looked.  Then cut away the fabric on the line, and continue basting the rest of the way around.
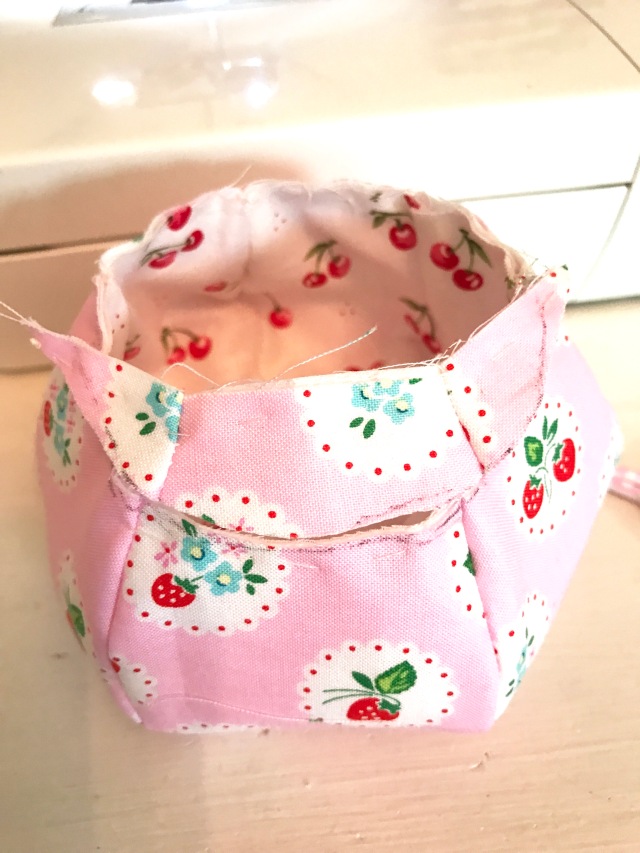
IMG_2226

IMG_2227

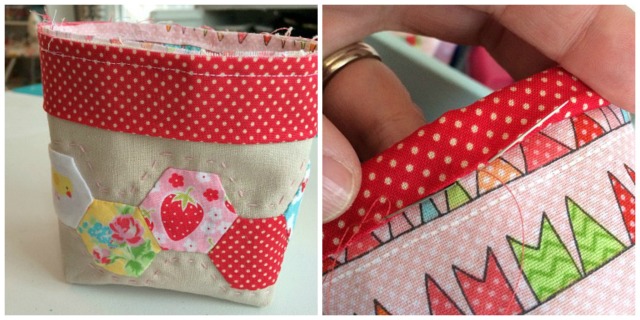
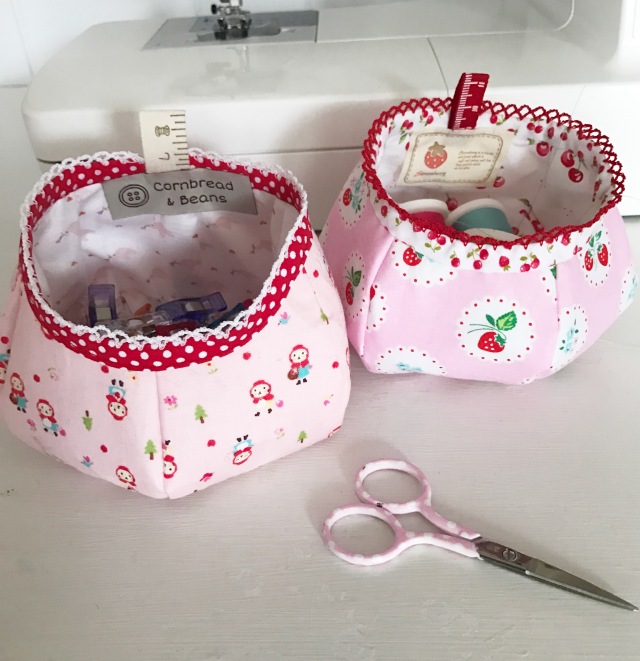
Add your binding, and any embellishments you like, fill with cute things, and enjoy!
IMG_2244

Embroidery Floss Folder Tutorial

c and b floss folder 042

Hi friends! I know it’s been a bit since last we spoke, and I really need to catch up with you all. I hope your summer is going well!

I’ve been doodling around with hand embroidery quite a bit these last few weeks as I find it’s very easy to do in the car, or at the beach while watching the kiddos.

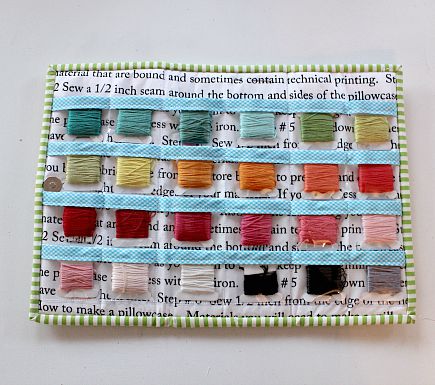
I kept dragging around my projects and floss in a draw string bag that kept getting all tangled up.  The solution? An Embroidery Floss Folder! Yeppa!

c and b floss folder 045

Here’s a quick and dirty tutorial if you need to make one too!

Supplies:

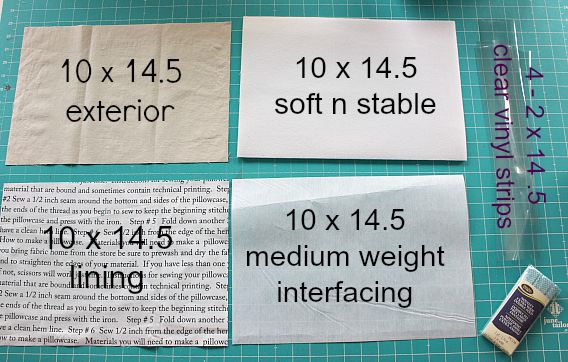
*10 x 14.5 inch  of one each-

Exterior, Lining, Medium weight fusible interfacing, Soft N Stable

*Package of binding for pockets (or make your own)

*2 strips x WOF for binding exterior

4- 2 x 14 .5 inch strips of vinyl  ( I think mine was 16 gauge ?)

A hera marker, non-stick presser foot, binding clips

c and b floss folder 006

Step One

Iron your medium weight interfacing onto the back of your lining fabric. Set aside

Step Two

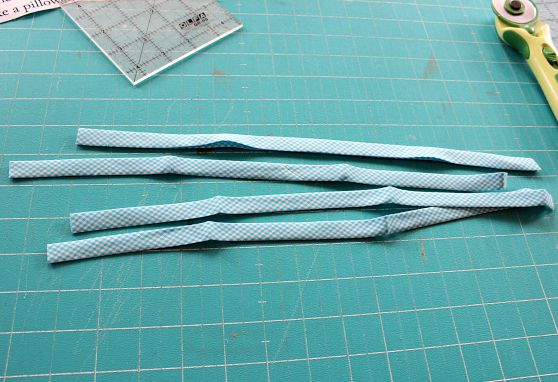
Cut your pocket binding strips into 15 inch strips.

c and b floss folder 007Using binding clips to help hold the binding on your vinyl pocket pieces, top stitch the binding onto all four.

c and b floss folder 011

Step 3

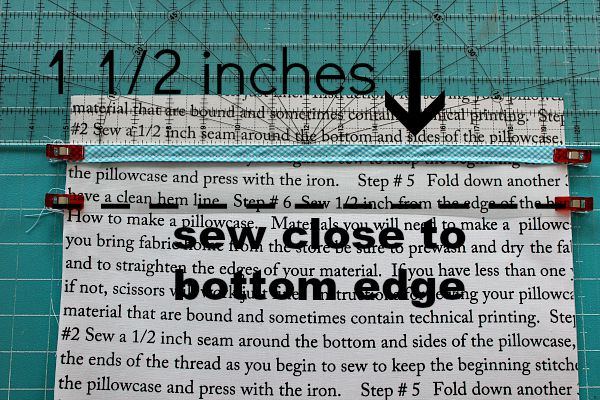
Use a ruler to measure 1 1/2 inches down from the top of your lining piece.  Line your first pocket up with this and use binding clips to hold as you stitch close to the bottom edge. If you have a non-stick presser foot for your machine it may help to use it for this step.

c and b floss folder 015

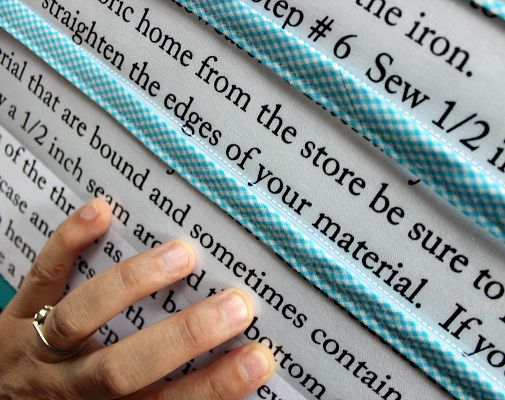
Continue lining the top of your pocket pieces up with the last stitched line and stitch close to the bottom of the vinyl.

c and b floss folder 021

The last pocket piece should leave about 1/2 inch of lining uncovered.

c and b floss folder 025

Step 4

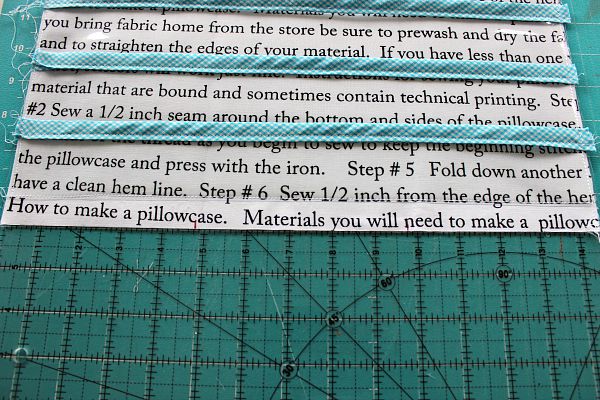
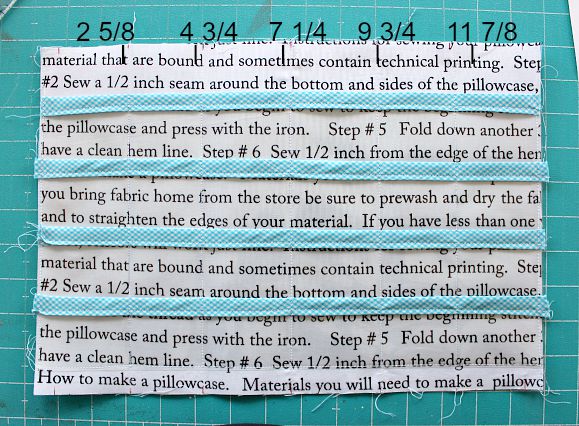
Using a water or heat soluble fabric marker and your ruler-mark lines at the top and bottom (picture shows only marks at the top, but do the bottom too!) at the 2 5/8, 4 3/4, 7 1/4, 9 3/4, and 11 7/8 inch marks.

c and b floss folder 028

Line your ruler up at the center marks first and press the line with a hera marker.

c and b floss folder 026

Machine stitch on the line you pressed with the hera marker.

Repeat this process with the other marks you measured -moving out from the center.

Congrats you just made your pockets!

Step 5

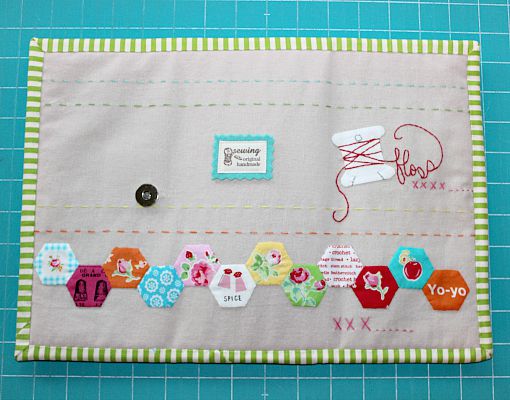
Embellishing-  you may chose to patchwork, embroider, or add applique to your exterior.  I added a little bit of this and that to my exterior.

Step 6

Layering-

Lay your lining/pockets face down, lay the soft n stable on top, then the exterior face up.

You may chose to add a snap or magnetic closure at this time.

If not then just use binding clips to keeps your layers together.

Use your walking foot to baste the layers together stitching with a 1/8 seam allowance around the entire outside.

c and b floss folder 038

Step 7

Bind your project like you would a quilt.

 c and b floss folder 040

 AND ENJOY!

Later gators,

Melissa

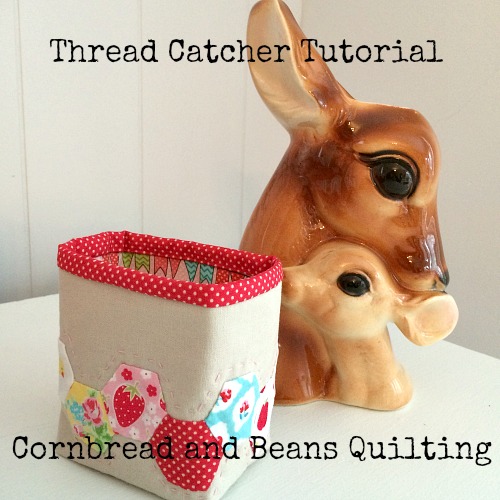
Little Hexie Thread Catcher Tutorial

candb quilting and decor 097

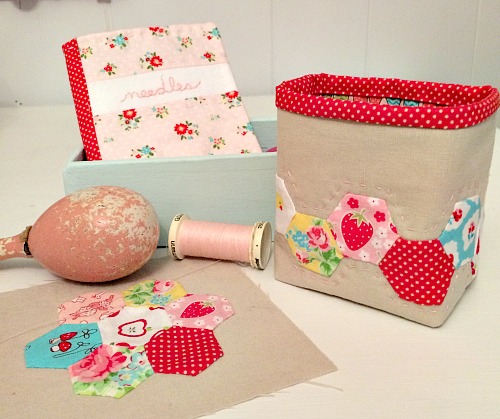
I’ve been wanting to play with English paper piecing for a long while. Specifically hexagons.  I have dabbled with them in a pattern I wrote a while back, but I would love to make a whole quilt with them someday.

To satisfy my itch, AND create something useful, I made a little thread catcher.

**If you would like a kit scroll down to the bottom**

IMG_3075

I’ve needed this little cutie forever. If you ever looked at my floor or table while I’m sewing you would see that I usually just toss the threads willy nilly all over the place. Now I have a little container to keep the place a little more tidy.

Would you like to play along?

First you will need to print off the 3/4 inch hexagon templates. I got mine here .

I used card stock. Print off a 1 inch template page too.  You can use one of the 1 inch hexagons as a cutting template for the fabric.

PicMonkey CollageThere are lots of tutorials on making hexies online, so I won’t go into that here.  My little tips are: use a baby rotary cutter to cut your fabric around your 1 inch template, and use a dab of sewline glue stick in the middle of your 3 /4 inch templates to keep the fabric steady while doing your tacking stitches.

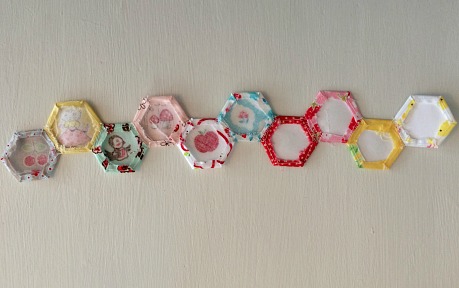
You will need 10 Hexies for this project.

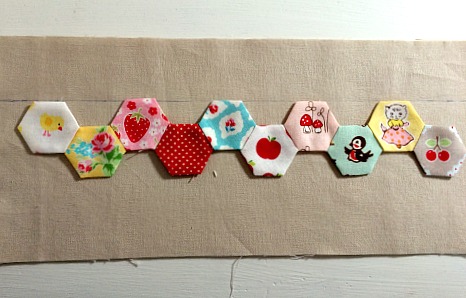
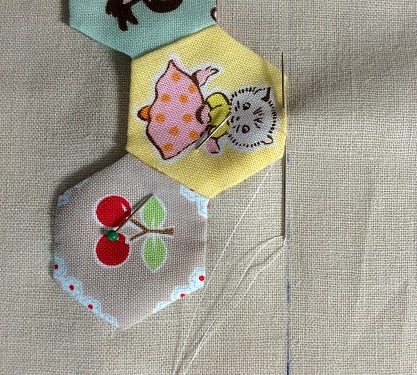
Lay them out in a pleasing manor and whip stitch them in a row like so:

candb quilting and decor 059

You can take your papers out as you go, or at the end. It’s up to you. I took mine out when I was completely done connecting them.

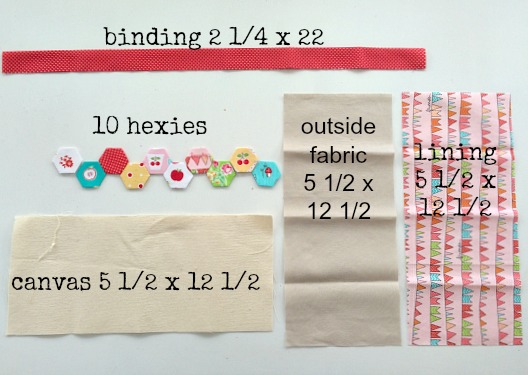
Cutting The Fabric

candb quilting and decor 045

5 1/2 x 12 1/2 main fabric

5 1/2 x 12  1/2 lining fabric

5 1/2 x 12 1/2 sturdy canvas or interfacing

2 1/4 x 22 binding

Construction

Let’s begin with the lining.

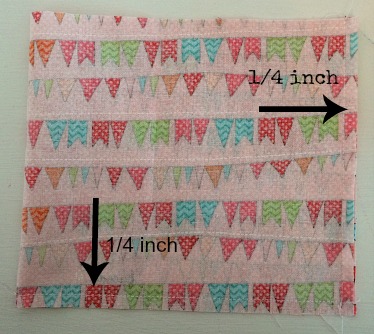
Fold your fabric in half and sew up the edges using a 1/4 inch seam allowance. (all seams are 1/4 inch for this project.)

Then sew the bottom with a 1/4 inch seam.  **At this point if your fabric is directional like mine, pay attention to which side is the bottom.

candb quilting and decor 049

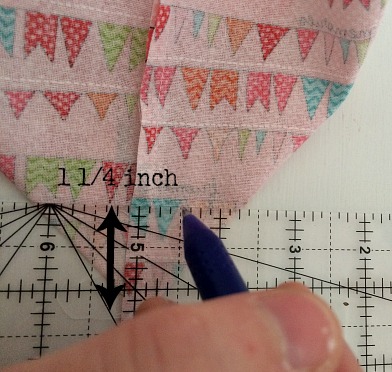
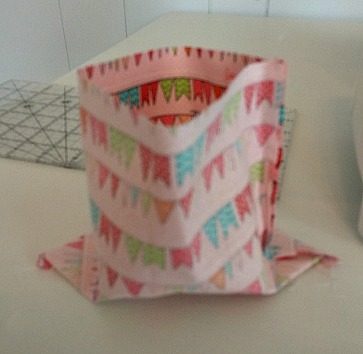
Next you will box the bottom by fiddling with your fabric until you have a flat  triangle in the bottom corner. Using your ruler measure in 1 1/4 inches from the tip of the triangle, mark a line with a water or heat soluble marking pen.  I use Frixon pens, they rock. Just run an iron over them and it disappears!

candb quilting and decor 054

Now sew on your line back stitching at the start and stop. Repeat on the other corner.

candb quilting and decor 055

Trim seams to quarter inch and set the lining aside.

candb quilting and decor 058

Now lets work on the outside.

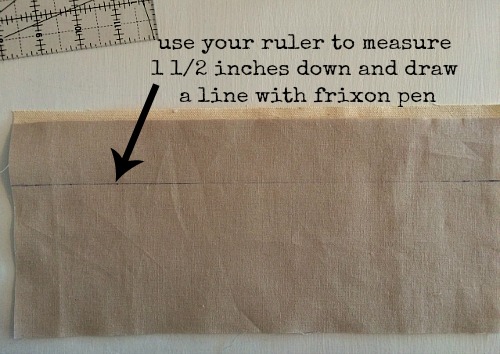
Using your ruler measure down 1 1/2 inches from the top (long side) and mark with your marking pen (be sure it is water or heat soluble you don’t want a permanent mark on your thread catcher!)  This is the guide for placing your hexies.

candb quilting and decor 061

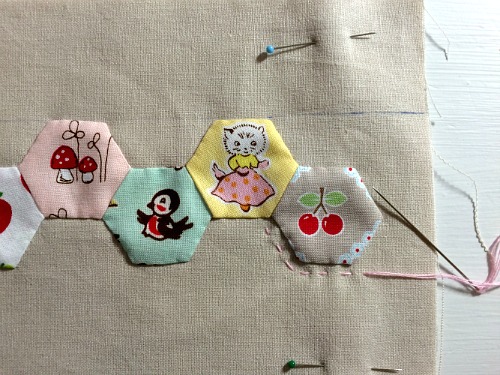
Next center your hexies , pin, and hand stitch.

candb quilting and decor 063

I use YLI silk thread and applique needles to stitch on.

candb quilting and decor 065

Now layer your outside fabric onto the canvas.  You can spray baste, safety pin, etc I just used some straight pins to hold the 2 layers together.

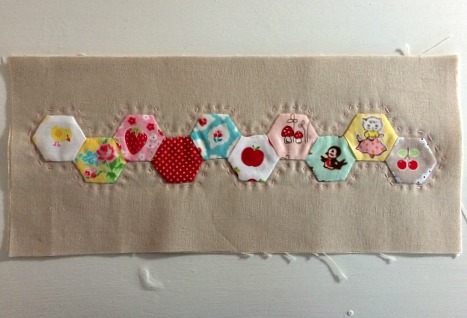
 Quilting time! Do whatever quilting you would like , I used 3 strands of DMC floss in pink to go around my hexies.

candb quilting and decor 066

When you are done you can remove your marking line. In my case I just had to run a hot iron over it.

candb quilting and decor 068

We are going to construct the outer unit just like we did the lining. Making triangles in the corner, marking a line at 1 1/4 inch, sewing on the line back stitching at the start and stop, trimming the corners off.

PicMonkey Collage3

Now turn the thread catcher inside out!

candb quilting and decor 075Isn’t it cute?

Now grab your lining and stuff it down inside. Use your fingers to push it down into the corners,  and pin the perimeter matching up the side seam. I hand basted a seam around the very top to make it easier to sew on the binding, so the fabrics wouldn’t shift.

candb quilting and decor 081

Now sew the binding to the outside using a 1/4 inch seam. Turn it inside out to make hand stitch the binding easier.

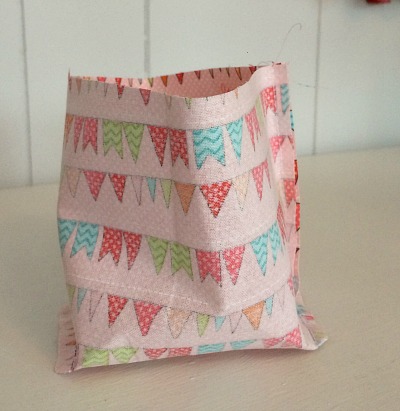
PicMonkey Collage8Turn it right side out and admire your adorable thread catcher!

candb quilting and decor 091

Pick up all the stray threads you just made and throw ’em in there! =)

Buy A Kit!!!

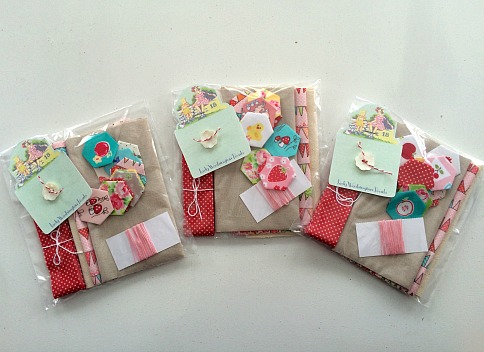
I have three one left little kits made up if you would like to purchase one.

They are $25.00 which includes shipping.

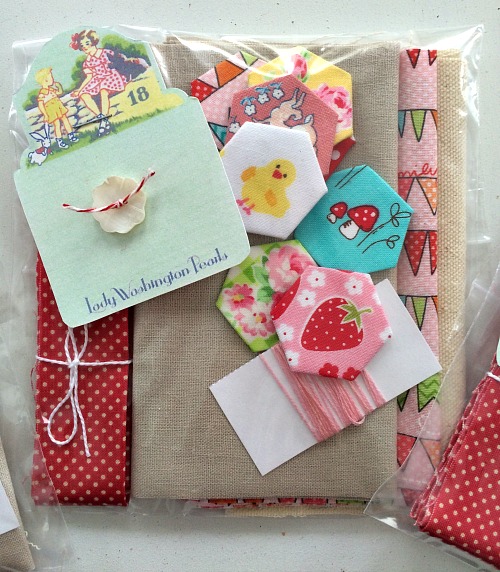
candb quilting and decor 037They include the lining, outer, and canvas fabric, the binding, the pink DMC floss for quilting, and the best part is I’ve already basted the hexies for you!!

candb quilting and decor 040

btn_buynowCC_LG

Later gators!

Melissa

Ouch Pouch-Christmas gift idea

Cornbread and Beans Quilting Blog 900

It’s getting harder and harder each year to come up with something to make for my sisters-in-law.  It’s tradition for me to gift them something handmade,and after 16 years in the family I’m running out of things to make for them.  There are only so many useful things made out of fabric that people who don’t sew will use.

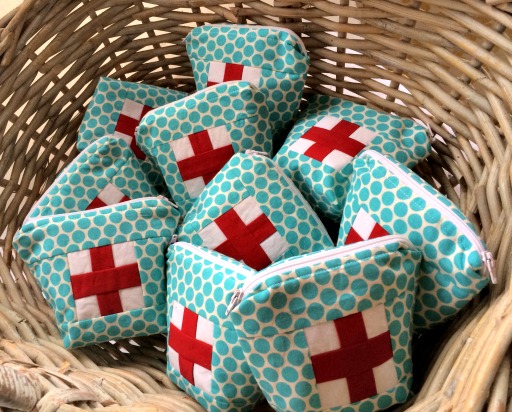
So this year I have resorted to making what’s inside more of the gift than the fabric part is. This is by no means an original idea,  I was inspired by A Spoon Full of Sugar’s emergency pocket. I needed mine to be a little bigger, and I didn’t want to applique the cross, so I incorporated it into the patchwork. Ouch Pouches are cute little zipper bags filled with mommy-needed things that you can put in your purse, car, or diaper bag. I think they will be quite handy dandy indeed!

photo2

Inside they are getting  Motrin, Pepto, boogie wipes,band-aides, wet ones, chap stick, burn aid, oral pain gel,  sting relief, neosporan,  tissue, etc.

Cornbread and Beans Quilting Blog 921

So whenever the little ones have an emergency while out and about, Mom will have it covered.

I found a great travel size website to order all the single packets from. I think it was called Minimus dot com.

Wanna make one or seven for your gift list?

Sew the cross together like so:

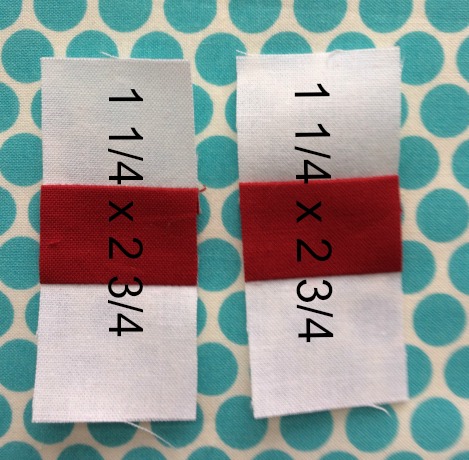
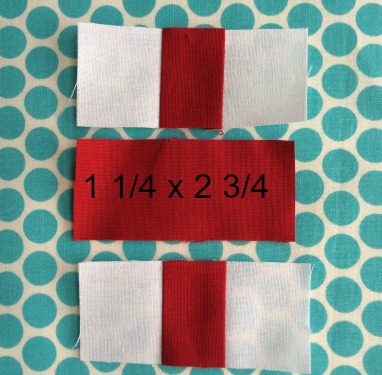
Sew 1 1/4 inch strips of white/red/white

Cornbread and Beans quilting 022

Cut into 1 1/4 x 2 3/4 inch segments.

Cornbread and Beans Quilting 1223

Cut a red 1 1/4 x 2 3/4 inch piece and sew the cross together.

Cornbread and Beans Quilting 2224

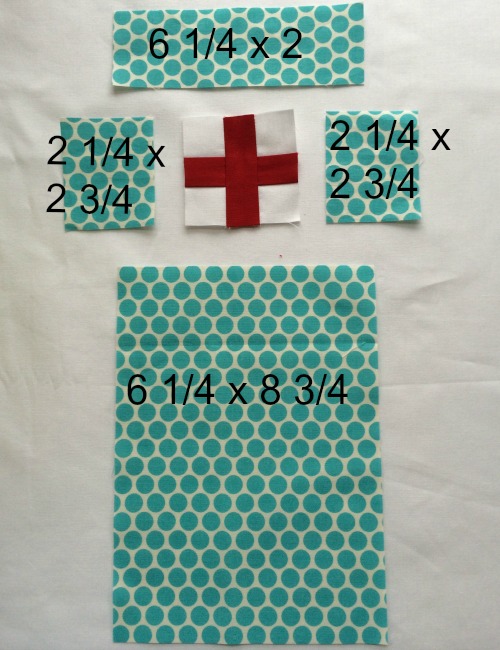
 Cut the other pieces of the front panel, then sew the front panel together:

Cornbread and Beans Quilting 2219

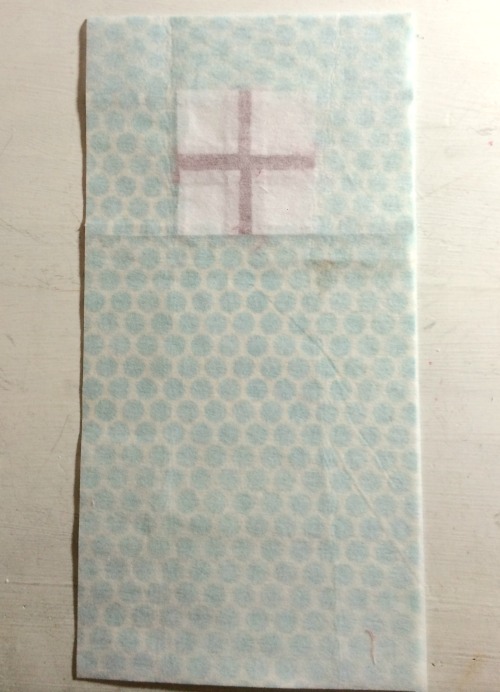
Cut fusible interfacing of your choice 6 1/4 x 12 3/4 and iron on the back of your front panel. (I used lightweight interfacing)

Cornbread and Beans Quilting 2225

Cut your lining panel 6 1/4 x 12 3/4

Cornbread and Beans Quilting 027

Place the front panel  right side down in the middle of your zipper which is facing right side up. Sew using a zipper foot.

Cornbread and Beans Quilting 2229

Flip over front panel and zipper and center your lining panel on the back side with fabric right side down.  Sew with zipper foot.  (you could do these two steps as one step layering front/zip/lining and sewing, but I don’t like to pin through zippers so I just do it in two steps so I can hold it with my hands and sew.)

Cornbread and Beans Quilting 030

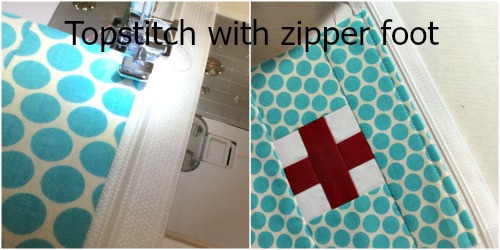
Press seams and top stitch using a zipper foot.

Cornbread and Beans Quilting 031

Cornbread and Beans Quilting 033

PicMonkey Collage44

Laying the piece down flat  then fold your front panel up centering on the front side of zipper and sew with zipper foot.

Cornbread and Beans Quilting 042

Flip the piece over and fold your lining panel up centering on the back side of zipper and sew with zipper foot.

PicMonkey Collage55

Unzip the zipper then press seams and top stitch with zipper foot. Don’t forget to top stitch!

Cornbread and Beans Quilting 055

Cornbread and Beans Quilting 056

Zip it back up, turn it so the front panel is right sides together on the inside, and the lining is right side out on the outside.

Cornbread and Beans Quilting 2258

Using your ruler measure 1 1/4 inches and cut.

Cornbread and Beans Quilting 059

Using scissors cut ONLY THE LINING panel in half at the bottom crease.

Cornbread and Beans Quilting 2260

Open your zipper a little more than 1/2 way for turning. Match everything right sides together and pin.  Sew the sides of the bag using a 1/4 inch seam allowance. The zipper teeth should be folded in half and facing the front panel.

Cornbread and Beans Quilting 067

Sew about a  3/4 inch on either end of the lining panel bottom using a 1/4 inch seam allowance, back stitching at start and stop.  This is your “turning hole.”

Cornbread and Beans Quilting 7767

Now match up your corners until flat, and sew using 1/4 inch seam allowance, back stitching at the start and stop.

Cornbread and Beans Quilting 069

Finish the corners of the lining the same way using 1/4 inch seam allowance, back stitching at the start and stop. Trim off the extra zipper on both sides with scissors.

Pull the bag right side out through the “turning hole”, sew the turning hole closed and stuff lining down into bag.  Zip it up and look at how cute it is!

Sewing Room Sailor Heart Tattoo Tutorial

cornbread and beans blog 053

Sure the blog title sounds confusing, but as soon as you saw the craft that goes with it I’m sure you now know what I meant.

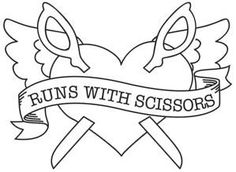
I was feeling crafty today and so I went through my “Sew It Up” category on pinterest.  I came across these awesome embroidery patterns that I had  pinned from Urban Threads.com

7d76664e2acf099132bf37148f3fdb01

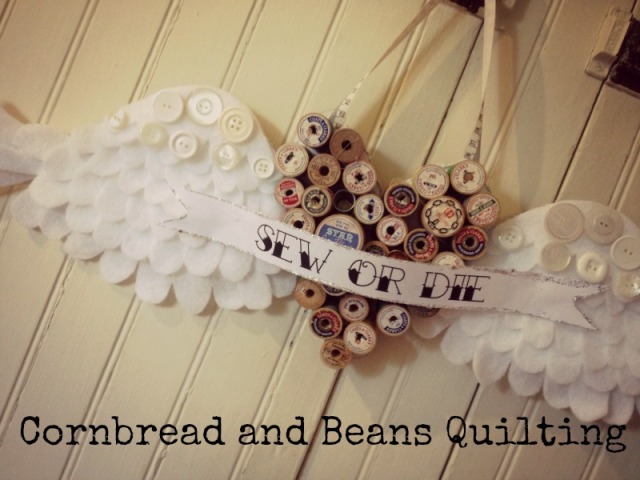
I had also always wanted to make a spool wreath, so I put the two ideas together and came up with a kick butt little piece of art for my sewing room.

Wanna make one too? LOL

First you need to gather:

some vintage spools

a pencil/marker

scissors

steak knife or exacto knife

cardboard

batting

glue gun and glue sticks

optional- glitter, elmers glue, printer and paper

Okay warning bad iphone photos ahead, I didn’t want to get glue on my new camera! LOL

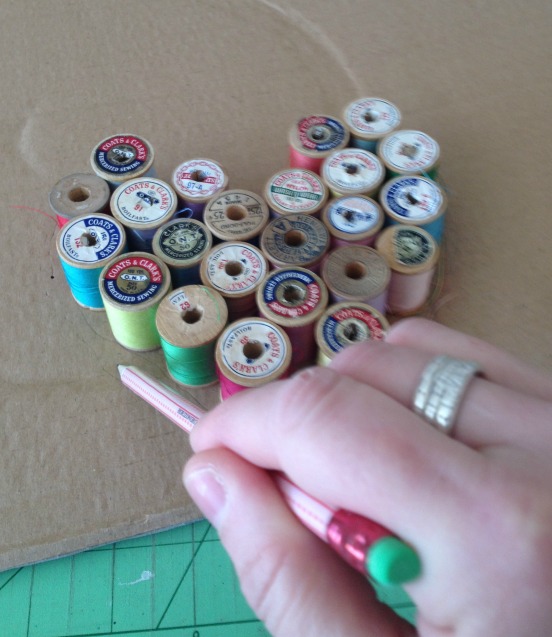
1. Start by placing your spools in a heart like shape on the middle of your cardboard and trace around the shape with a pencil.

cornbread and beans blog 028

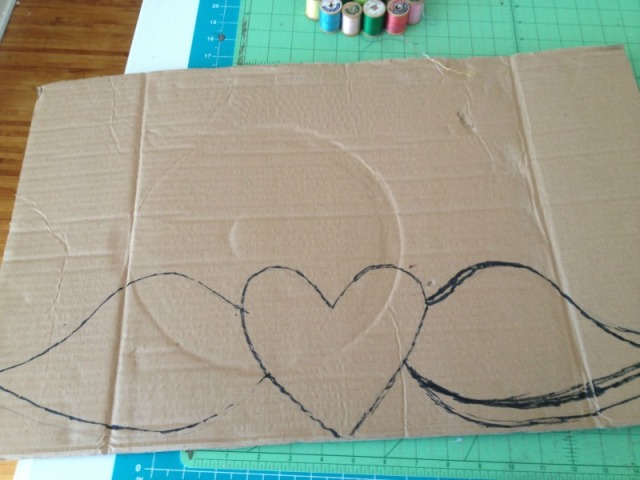
2. Take your spools off and then draw some little wings on each side of the heart. I  used pencil first and then went over it with a black marker so I could trace the wing with paper , cut it out then used it as a template for the other wing.

cornbread and beans blog 030

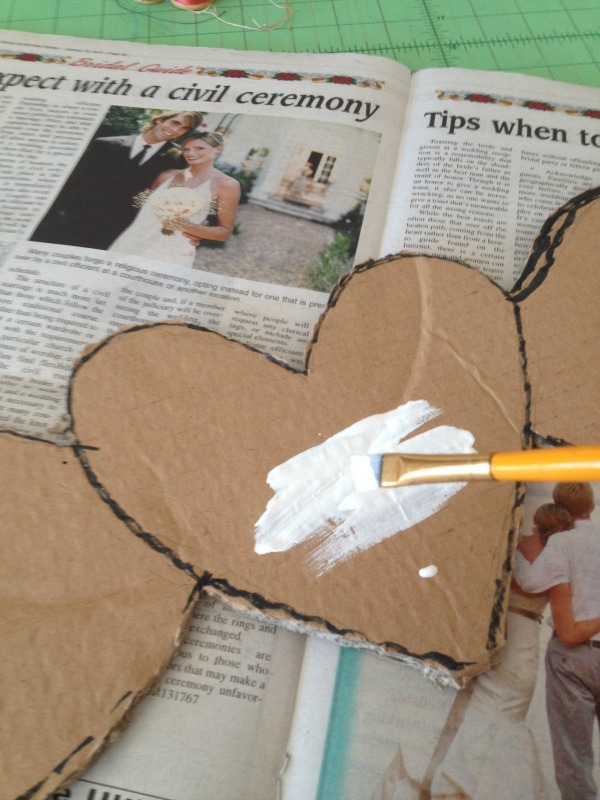
3. Cut your heart/wings out with an exacto knife.  I seem to have lost mine, so I just used a steak knife….very high tech. I then used some acrylic white paint to paint it out so that I would have a white background if anything showed throw.

cornbread and beans blog 035

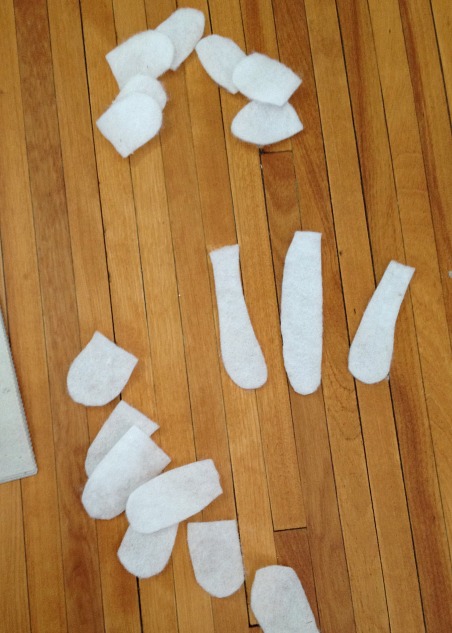
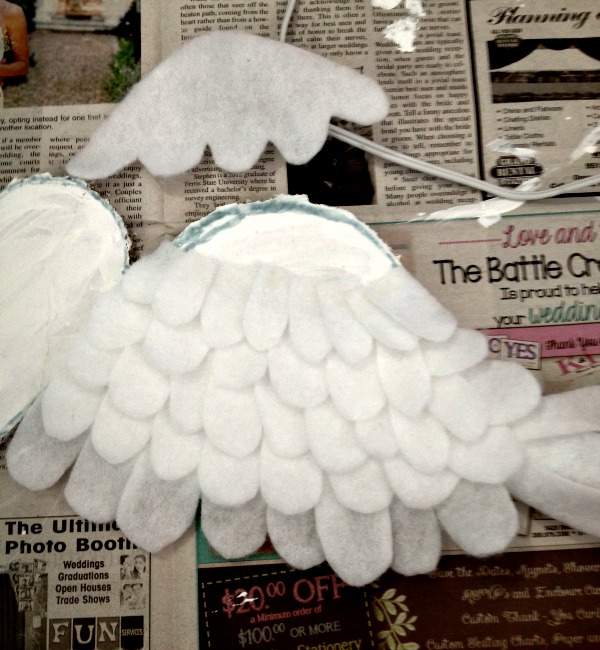
4. Now cut some feathers out of your batting. I cut three or four long feathers for the ends of the wings, and then just some little u shapes for the middle.  I used my paper template that I used to trace the left wing and cut a little “cap” for the top of the wing.  I mostly just fudged this and every feather was kind of wonky.

cornbread and beans blog 036

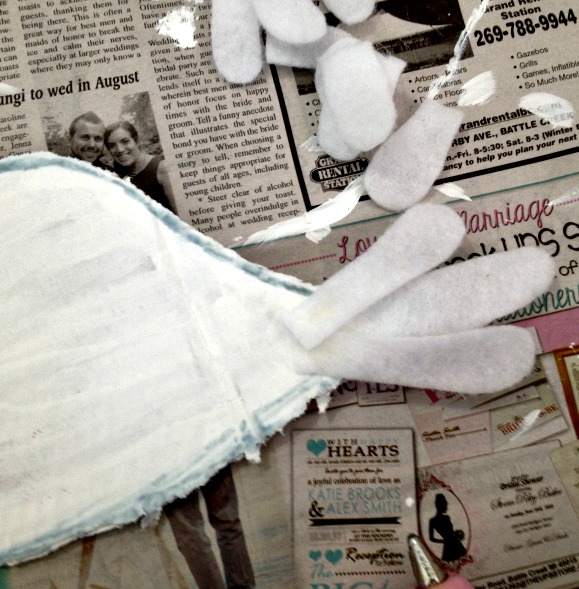
5. Start gluing your feathers on with your glue gun. Start with the wing tip and long feathers.

cornbread and beans blog 037

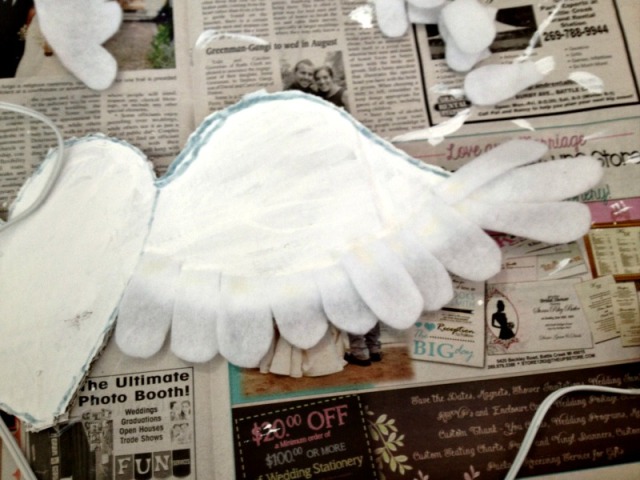
Then keep going with the bottom row on the bottom of the wing.

cornbread and beans blog 038

Keep going until you reach the top , then add your little wing cap. (see my wing cap in the top of the picture.)

cornbread and beans blog 039

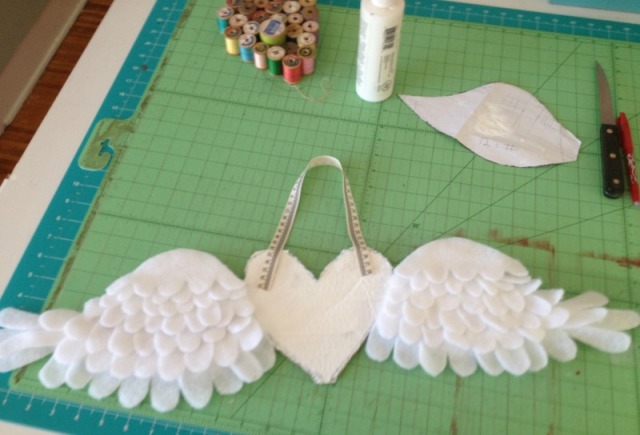
6. When you have both wings done, use your glue gun  to  attach a hanger. I used measuring tape ribbon.  Then glue on your spools.

cornbread and beans blog 040

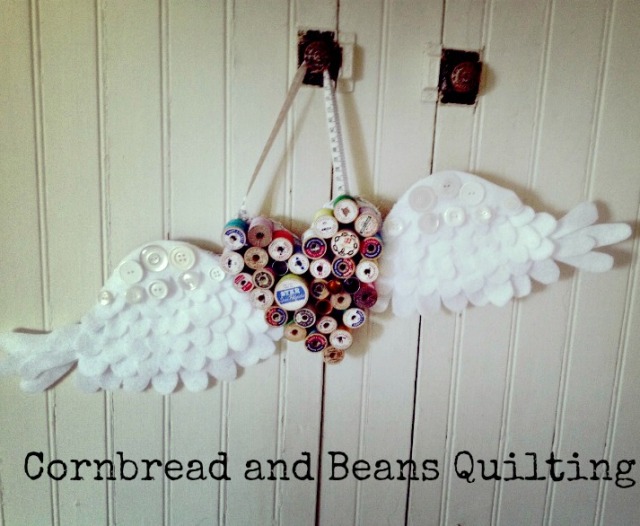
I added some buttons to the tops of my wings, you could be as creative here as you want….you could add glitter to the wings, hot glue on some scissors or anything else sewing related.

You could leave it plain.

cornbread and beans blog 044

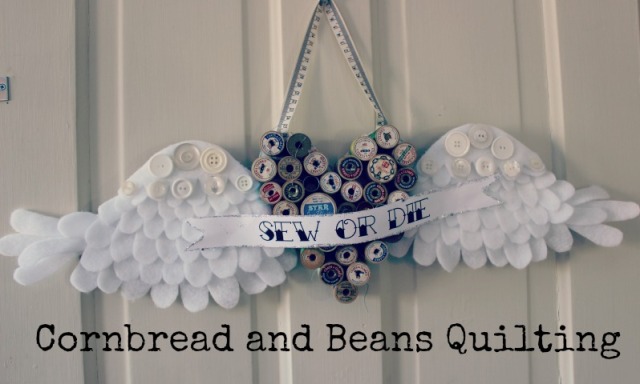
Or print out a little banner and glitter the edges:

cornbread and beans blog 058

I had fun! I hope you craft something cool too!

Later gators,

Melissa

Linking Here

Free Fall Table Runner Pattern!

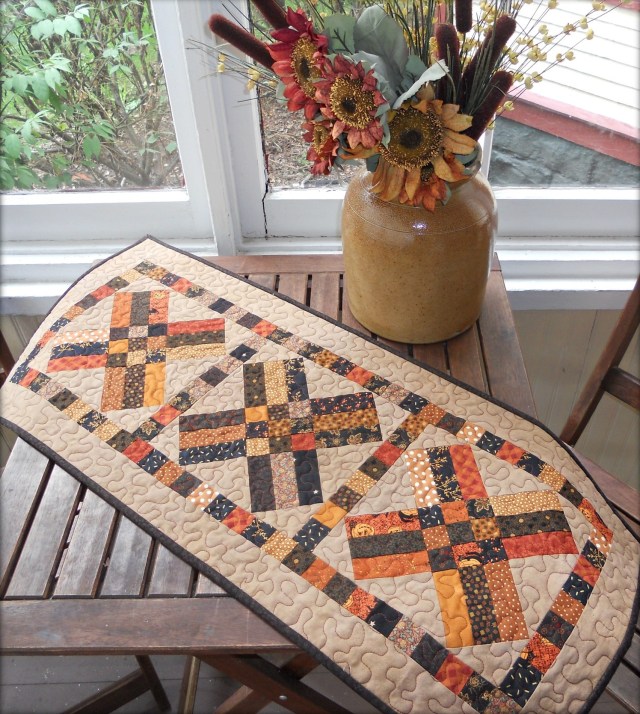
I was clicking through Pinterest the other day and ran across a most  delicious block posted by Quilt Twin.  I knew I wanted to sew a couple up! I also knew I wanted to make a couple new Autumn feeling little quilts.

I played around with my orange and black fabrics and came up with this setting which I thought I would share with you.

Instructions in PDF form:

Fall Table Runner

You’ll have  enough left over from the strip sets to make a couple extra blocks into little quilts too!

Happy, Happy Autumn Decorating!

After while crocodile, Melissa.

Grungy Farm Egg Tutorial

It is so spring like in Michigan that I can’t help but set my sights on spring time decorating.

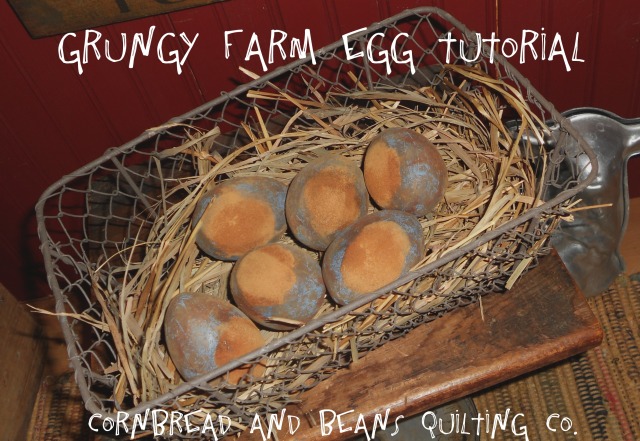
I saw these grungy looking eggs at an antique store awhile back and I decided I would give a go at making them myself.

Wanna join me?

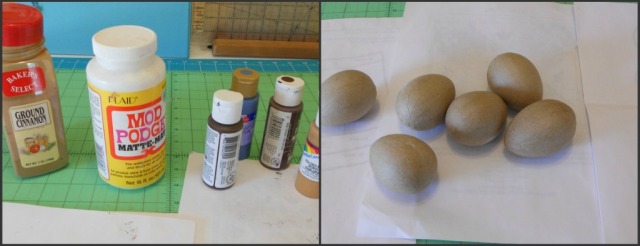
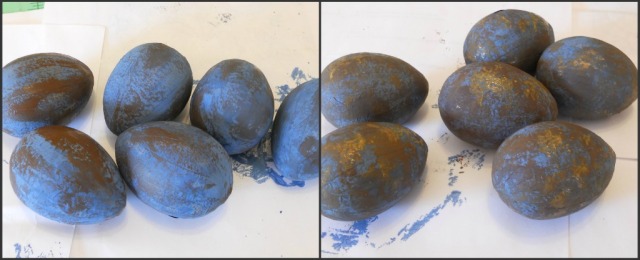
You’ll need some Mod podge, cinnamon, paint brush,  various brown craft paints,  a blue paint  of your choice, and some paper mache’ eggs.

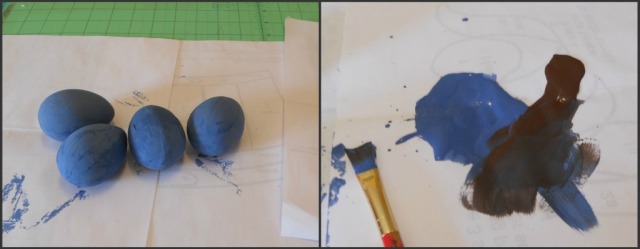
First give your eggs a light coating of blue paint.

When they dry mix in some brown and dry brush that on.

Keep adding and dabbing different brown mixtures until you are satisfied with the look.

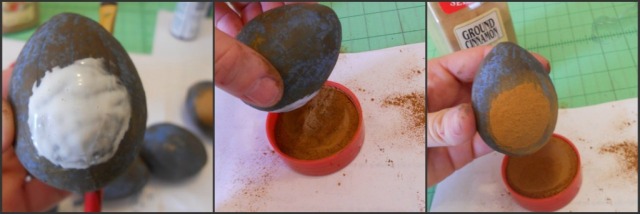
Paint a circle of mod podge then dip in cinnamon.

When dry you can give it a light spray of matte sealer just on the cinnamon circle  if you would like.

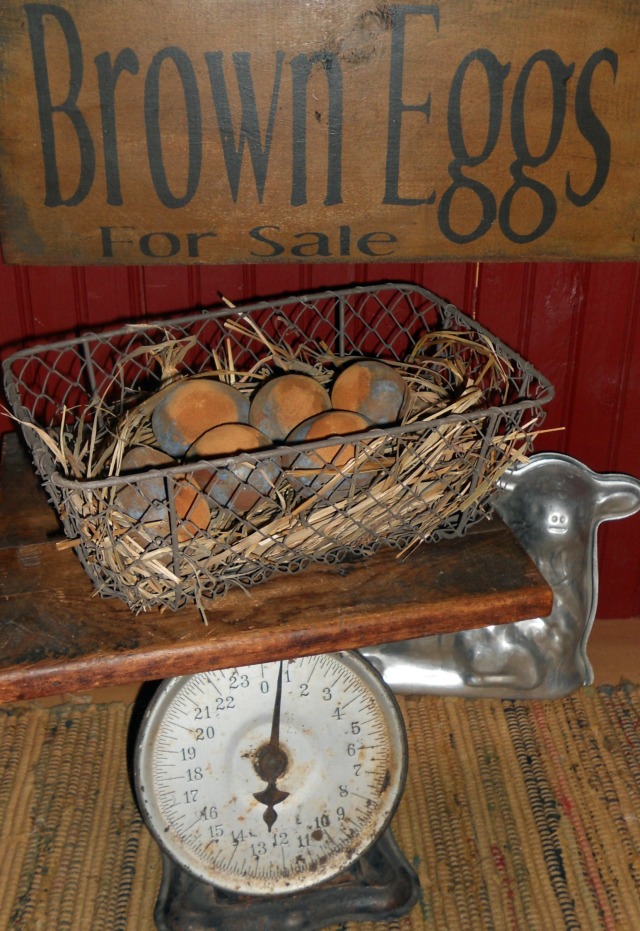
Before adding the eggs to your basket dry brush a little cinnamon all over the rest of the egg to give it a more matte, rusty, dusty look.

Pair your grungy farm eggs with a spring-y sign and wait for the spring to actually arrive!! =)

Lator Gators,

Melissa

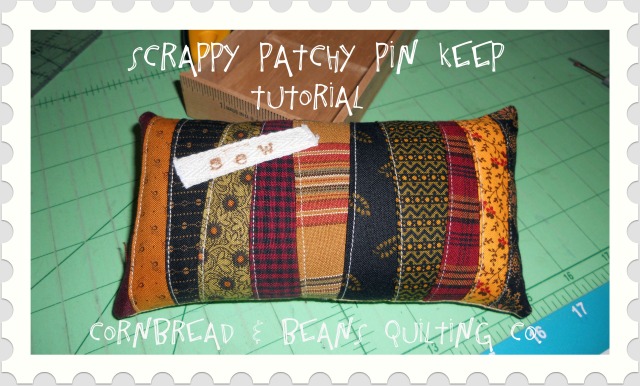
Scrappy Patchy Pin Keep Tutorial

Here’s a fun way to use up some scraps!

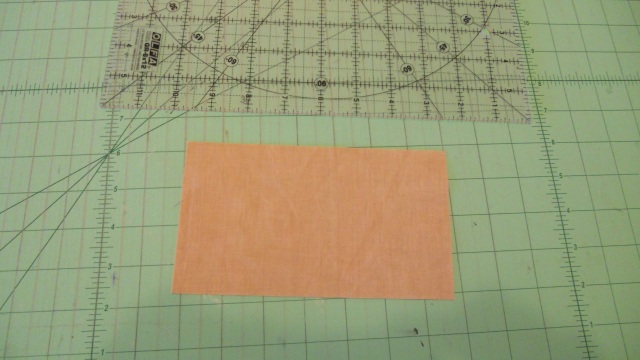
1.  Use some neutral fabric scrap to make a foundation.  Cut this piece whatever shape or size you want your pincushion to be,  just make sure to account for seam allowance.

I wanted my pin cushion to be a rectangle around 3 x 6, so I cut my foundation piece 4 x 7.

please don’t mind my grubby cutting mat, you don’t know what kinds of things I get up to on this thing….CRAFTING things!!!

2. Dig out your scraps!  This is liberatingly imprecise  so just go with me.  Cut your first 2  scrap piece 4 x whatever ( I suggest 1 1/2 -2 1/2 for all or your pieces)

One scrap you need to press about 1/4 inch wrong sides together

Ewww grungy ironing board too! Time to make a new one. It’s because I work so hard sewing all day people…it really is.

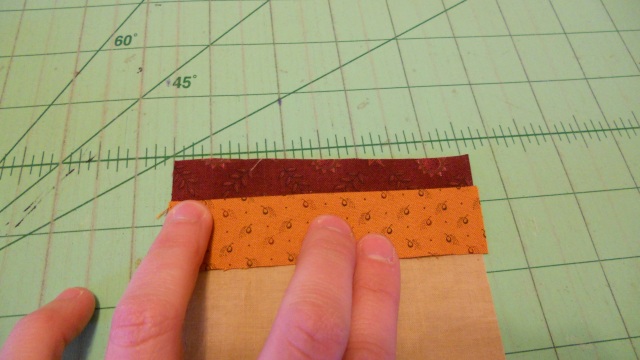
Now lay your first scrap piece (the unpressed one) on your foundation, and overlap the pressed piece on top.  You can lay this as straight or as crooked as you would like.

I am doing a crooked version so I lay my pressed piece on a slight diagonal.

Now you can pin if you like, if you wouldn’t like   just walk this over to your machine and sew as close to the edge as you can comfortably do.

Dear heavens you don’t realize how dusty/painty/thread-y  everything is until you try to take close up’s for a tutorial.  Next tutorial I will have sparkling clean EVERYTHING!!

3. You are now going to continue cutting scraps but from now on they need to be about 5 x whatever if you are laying them out on a diagonal.  If you are doing a straight layout you can keep cutting them at 4 x whatever.

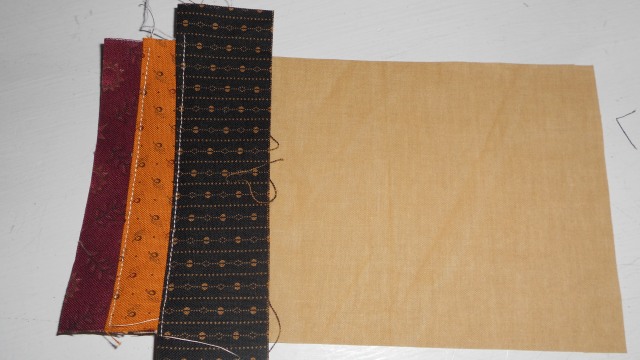
So press your next piece,  lay it on, sew, then flip and trim.

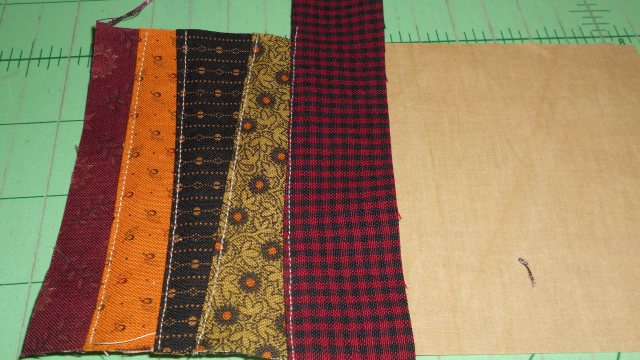
Continue in this manner:

Until you reach the end of your foundation piece.

I sewed a little twill tape on mine you can too!

4.  Cut a backing the same size as your foundation piece (mine was 4 x 7)  and sew it up right sides together.

I am putting mine inside a box so I sewed all the way around with a 1/4 inch seam allowance, but if yours is going to be free standing you may want to leave an opening for turning that you whip stitch closed after stuffing.

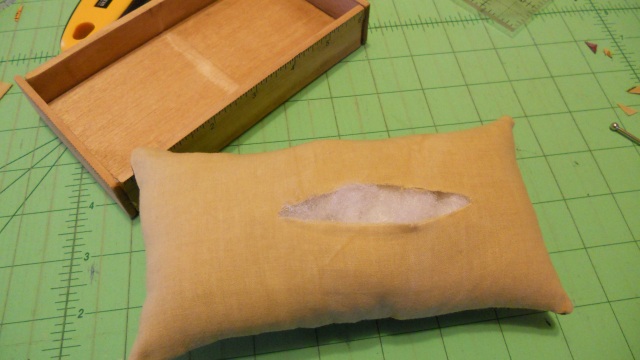
5. As I mentioned above my back side wont be showing….so I took a seam ripper and carefully made a slit in the bottom piece, turned right side out, stuffed, then whip stitched the opening closed.

I stuck mine in a little ruler box with some cute doo dads attached.

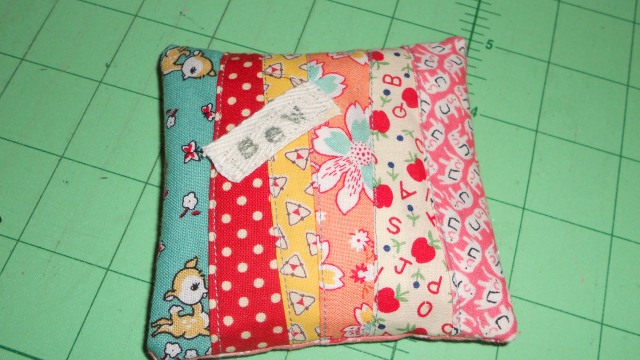
Here is  a 3 x 3 I made using 30’s prints:

You could make round ones, fat ones, skinny ones…the possibilities are endless.

Have fun!

Later Gators,

Melissa

Rustic fall craft idea…Early Drying Board.

I puttered around crafting yesterday,  creating some new fall arrangements for the homestead.

Today I wanted to share this easy idea with you.

I’m calling it an Early Drying Board even though I know the drieds need to hang upside down to dry.

But it’s my craft world so …whatever goes in my craft world. LOL

What you need:

1. A piece of old barn wood or scrap wood.

  ( I literally picked mine off an old abandoned barn.  I saw it hanging there and whipped my car over and jumped out and grabbed it! Don’t tell on me!)

2.  A piece of burlap to fit your board. (1/2 yard should be plenty)

3. Feathers, cattails, flowers, weeds, etc.   The dried real thing or faux, whichever you prefer.

4. 4 upholstery tacks.

How to do it:

1.  Don’t clean off your wood the grungier the better! LOL

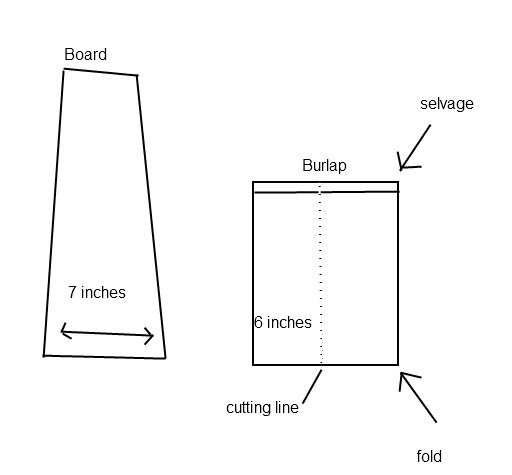
2. Measure the width of your board and cut your burlap about 1 inch less.

Cut with the fabric on the fold so that you only have to sew up the sides to make a pouch.

3.  Decide how long you want your pouch to be.

This will depend on how long your board is, so  eye ball it then cut your burlap adding 1/2 inch for turning under.

4. Press the top raw edges down 1/2 inch.

5. Sew using 1/2 seam allowance on both sides, back-stitching at the ends to secure.

6. Turn inside out and press.

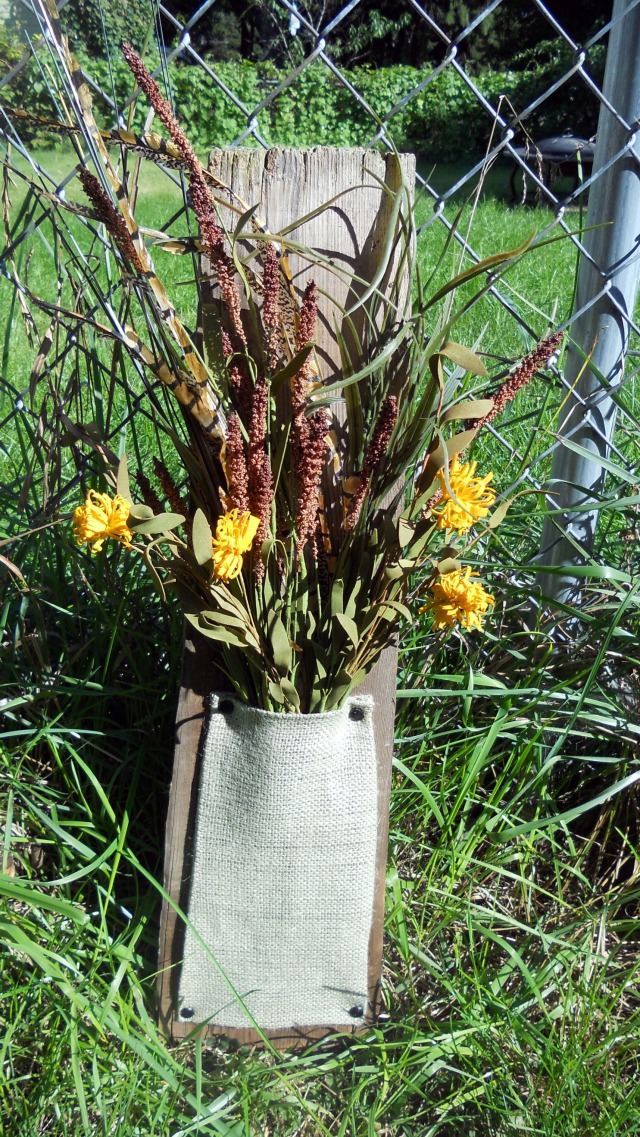
7. Tack the burlap pouch to the board using upholstery tacks in all four corners.

8. Stuff your pouch with lovelies from the fall harvest.

I’m going to find a spot to hang mine on the wall, but you could drill two holes in the top and thread twine through to make a hanger for a peg board!

Later Gators!

Melissa

winter dabbling #2

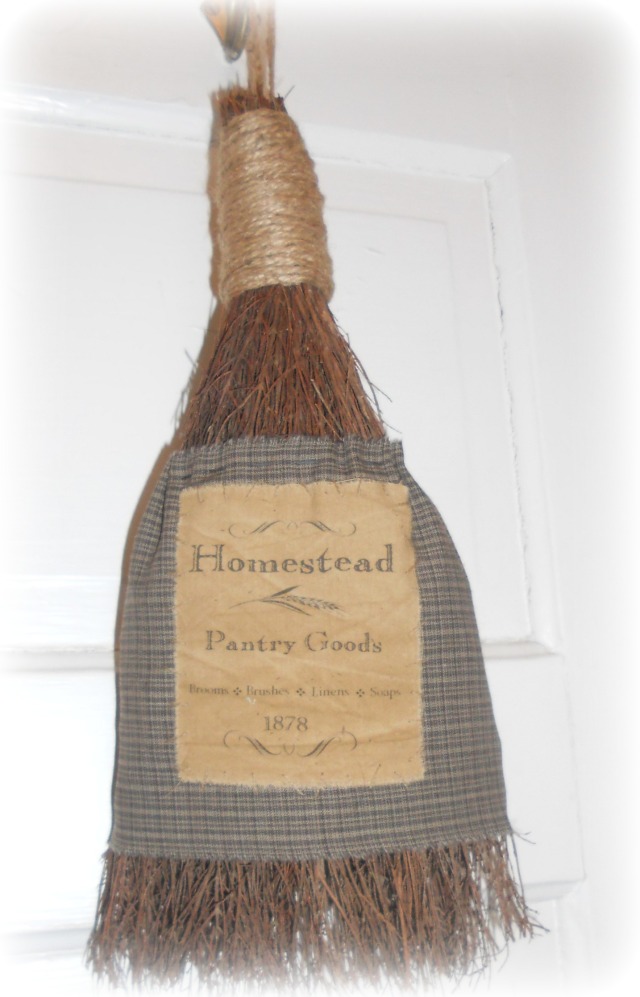
Today’s little project that I am sharing is a primitive whisk broom that was born from a random trip to Michael’s craft store.

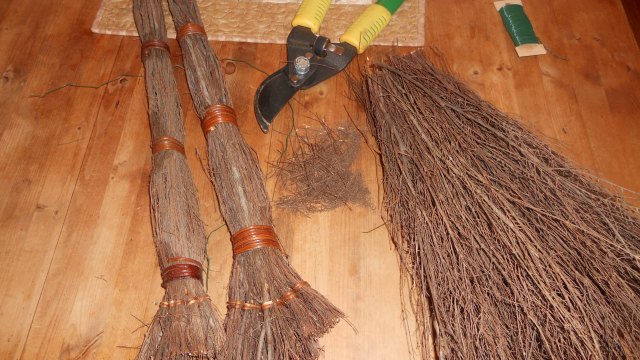
I found these in the 90% off Christmas stuff.  The thing that drew me to them was the AWESOME cinnamon smell, just like the pine cones they have out at Christmas. YUMMMM They were  cheap, 49 cents a piece, so  I took five of them thinking I would just chop them off and put them in my crocks to enjoy the nice smell.

Which I did with two of them.

I used 2 more to make a little whisk broom. Won’t you join me? (giggle)

First you need to cut them down a tad, I cut them off just below the first wicker tie with garden snips.

Don’t be like me and do this part at the kitchen table…..take yours outside and cut it so that you don’t make a big fat mess like I did.

Then I squeezed them together at the top end and wrapped floral wire very tightly around several times.  Once it was fairly secure with floral wire, I wrapped jute around and around making a loop on the back for hanging, then used a dab of hot glue to secure the end.

(  HA! look at my grody glue gun!)

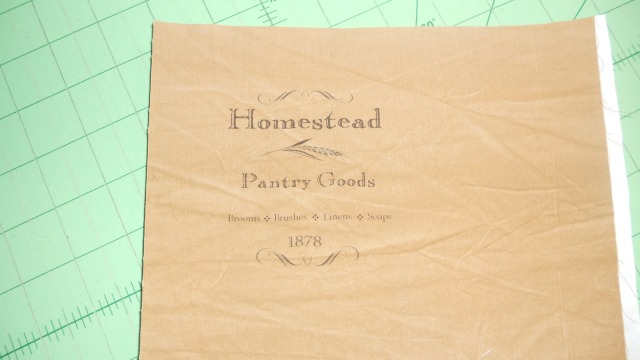
Now we are going to make a primitive label for our whisk.

You can type up something or you can use the one I made here:

Cut out a piece of wax paper the size of a piece of pinter paper ( 8 1/2  x  11) and iron it to the back of some muslin, making sure the waxy side is toward the fabric.  I used some nice dyed muslin.

Then using a mat/ruler/rotary cutter , trim the muslin to the same size as the freezer paper= 8 1/2 x 11

As this is the same size as a sheet of paper it should run through your printer fine, it worked for me and this was my first time trying it. So I have no great advice for you if it doesn’t work. LOL

Print off your label.

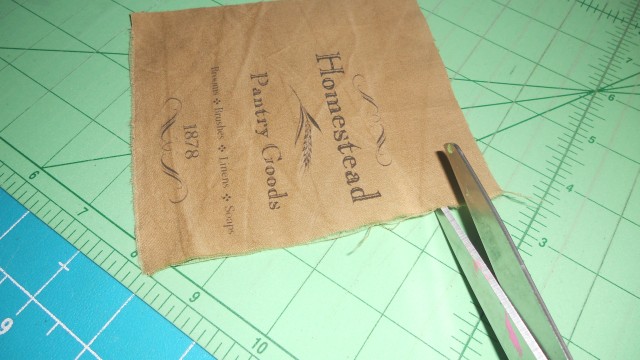
Peal off the freezer paper and trim around your label. (You can save the freezer paper to use again!)

I cut a little slit with the scissors and ripped my fabric so that I would have nice frayed edges, but you can trim yours with a rotary cutter if you prefer.

I then did the same ripping method to cut a piece of homespun big enough to wrap around my broom with about a 1 inch overlap in the back.

Attach your label in the middle of the homespun with BIG primitive stitches.  I used a nice old looking wool floss.

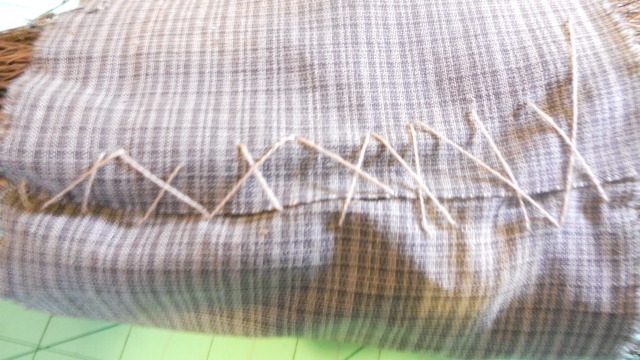
Wrap it around your broom and make BIG primitive  x stitches.

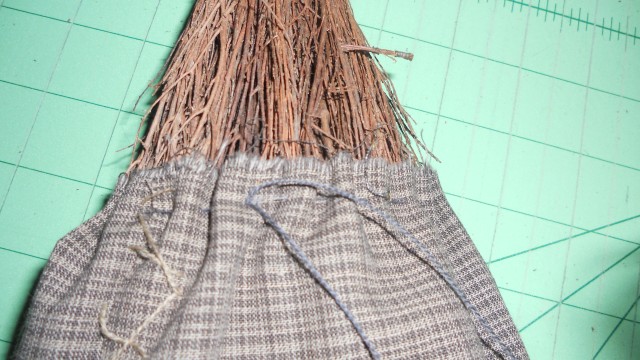
Starting in the back, make a running stitch all along the top at around 1/4 inch down.  When you get back to where you started you can pull both ends tight and tie off. This gives you the tapered edge you need.

Man it smells so good!

Later gators!

melissa